Want to make your wall art stand out like never before? The right lighting can transform your favorite pieces from ordinary to extraordinary.
But where should you place those lights to get the best effect? You might be surprised how small changes in lighting placement can completely change the mood and focus in your room. Keep reading to discover simple, expert tips that will help you highlight your wall art perfectly and create a stunning atmosphere in your home.
Your walls deserve to shine—let’s make sure they do.
Choosing The Right Light
Proper lighting makes your wall art stand out. The right light highlights details and colors.
Selecting suitable lighting improves the room’s mood and shows off your art well.
Types Of Wall Art Lights
There are many lights for wall art. Each type offers a different look and effect.
- Picture lights attach above or around the art for direct illumination.
- Track lights allow you to adjust the light angle and position easily.
- Recessed lights sit in the ceiling and provide soft, focused light.
- Wall washers spread light evenly across the art and wall surface.
Bulb Color And Brightness
Bulb color affects how your art looks. Choose warm or cool light based on the art style.
Brightness changes the mood. Too bright can cause glare, too dim hides details.
- Warm light (2700K–3000K) gives a cozy feel and suits traditional art.
- Neutral light (3500K–4100K) shows colors naturally and works for most art.
- Cool light (5000K–6500K) creates a modern look and highlights bright colors.
- Use bulbs with 300–500 lumens for balanced brightness.
Energy Efficiency Options
Energy-efficient bulbs save money and last longer. They reduce heat near your art.
LED bulbs are best for wall art lighting. They use less power and protect your paintings.
- LED bulbs use about 75% less energy than traditional bulbs.
- They emit very little heat, preventing damage to art.
- LEDs come in many colors and brightness levels.
- Look for bulbs with a high Color Rendering Index (CRI) above 80 for true colors.

Credit: www.julieannrachelle.com
Positioning For Impact
Lighting can change how your wall art looks. The right position brings out the colors and shapes clearly.
Placing lights correctly helps avoid glare and shadows. This keeps the art easy to see and enjoy.
Ideal Height For Fixtures
Place light fixtures about 60 to 66 inches from the floor. This height works for most wall art sizes.
Keep the lights at eye level to avoid bright spots or dark areas on the artwork.
Optimal Distance From Artwork
Lights should be close enough to highlight details but not too close to cause damage.
- Keep lights 6 to 12 inches from the artwork surface.
- Use narrow beam angles for small art pieces.
- Choose wider beams for larger paintings.
Avoiding Shadows And Glare
| Problem | Cause | Solution |
|---|---|---|
| Shadows on art | Light source too close or at wrong angle | Adjust fixture angle to 30 degrees |
| Glare spots | Direct light hitting glossy surface | Use diffused lighting or dimmer switches |
| Uneven light | Single fixture for large art | Add multiple lights evenly spaced |
Lighting Techniques
Good lighting makes wall art look its best. It highlights details and creates mood.
Different lighting techniques help show off art in unique ways. Choose the right one for your space.
Accent Lighting Methods
Accent lighting draws attention to your wall art. It creates focus and depth in a room.
Use directional lights that highlight the art without glare. This makes colors and textures pop.
- Wall sconces angled toward the artwork
- Picture lights mounted above frames
- Recessed lights aimed at art pieces
Using Spotlights And Track Lights
Spotlights focus a strong beam on specific art pieces. They create dramatic effects.
Track lights are flexible and easy to adjust. You can direct them to different artworks anytime.
- Place spotlights about 30 degrees from the art
- Adjust track lights to highlight multiple pieces
- Use LED bulbs to avoid heat damage
Layering With Ambient Light
Ambient light fills the room with soft, even brightness. It balances accent lighting well.
Layering ambient light with focused lights adds warmth. It prevents harsh shadows around the art.
- Use ceiling lights or lamps for ambient light
- Combine with accent lights to create depth
- Dim ambient lights for cozy atmospheres
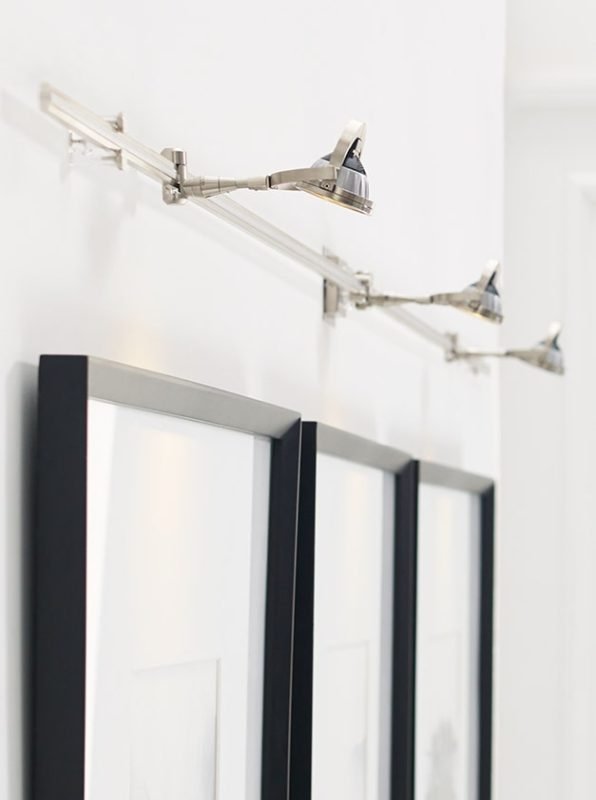
Credit: www.visualcomfort.com
Enhancing Different Art Styles
Good lighting can change how you see art. It brings out colors, textures, and shapes. Different art styles need different lighting to look their best.
Use the right light to make paintings, sculptures, and mixed media pieces shine. This guide helps you place lights to enhance each style.
Lighting For Paintings
Paintings look best with soft, even light. Avoid glare or harsh shadows that hide details. Use adjustable spotlights to control focus and brightness.
- Place lights at a 30-degree angle to the painting.
- Use LED bulbs with high color accuracy (CRI 90+).
- Keep the light source about 6-12 inches from the wall.
- Avoid direct sunlight to prevent fading.
Illuminating Sculptures
Sculptures gain depth with three-dimensional lighting. Use multiple lights to highlight form and texture. Shadows add drama and interest.
| Light Type | Effect on Sculpture | Placement |
|---|---|---|
| Key Light | Highlights main features | Front or side, 45-degree angle |
| Fill Light | Softens shadows | Opposite side, lower intensity |
| Back Light | Creates outline and depth | Behind sculpture, aimed at edges |
Highlighting Mixed Media
Mixed media art often has many textures and layers. Use flexible lighting that you can adjust. Focus on parts with the most detail or color contrast.
Tips for Mixed Media Lighting:
- Use track lighting for easy repositioning.
- Combine warm and cool lights to show color depth.
- Try side lighting to reveal textures.
- Control brightness to avoid washing out details.
Practical Installation Tips
Lighting can highlight your wall art beautifully. Proper installation makes sure your lights work well and last long.
Use safe and smart methods to place lights around your artwork. This guide gives useful tips to help you install lighting correctly.
Wiring And Safety Considerations
Check your home’s wiring before starting. Make sure the power is off to avoid shocks. Use wires rated for lighting to prevent fire risks.
Keep wires hidden or secured to avoid tripping. Use cable covers or run wires behind the wall if possible. Follow local electrical codes for safety.
- Turn off power at the breaker box
- Use insulated tools and gloves
- Choose wires with proper voltage rating
- Secure wires away from heat sources
- Consult an electrician if unsure
Mounting Fixtures Securely
Use the right anchors and screws to hold light fixtures. Drywall anchors work for light pieces. Use wall studs for heavier fixtures.
Measure twice before drilling holes. Make sure fixtures are level and stable to avoid falling or damage to art.
- Mark fixture position on the wall
- Find studs with a stud finder
- Use anchors for drywall mounting
- Use a level to align fixtures
- Tighten screws securely but avoid overdriving
Adjustable Lighting Solutions
Choose lights that you can move or tilt. Adjustable lights let you change the focus on your wall art. This helps highlight different parts of the piece.
Track lighting and spotlights are good options. They offer flexibility and control to create the perfect look for your art.
- Use swivel heads for directional light
- Choose dimmable fixtures for mood control
- Install track lighting for multiple adjustable spots
- Use remote or smart controls for ease
Maintenance And Upkeep
Wall art lighting adds charm to any room. Keeping it in top condition is essential. Regular maintenance ensures long-lasting performance.
Simple upkeep tasks prevent common issues. Learn how to clean, replace, and troubleshoot effectively.
Cleaning Light Fixtures
Dust and dirt can dim your lights. Clean fixtures regularly to keep them shining bright. Use a soft cloth to avoid scratches.
Turn off the power before cleaning. This ensures safety and avoids electrical shocks.
- Use a damp cloth for stubborn grime
- Check for loose screws while cleaning
- Dry fixtures thoroughly to prevent rust
Replacing Bulbs Efficiently
Replacing bulbs is a simple task. Have spare bulbs ready to avoid inconvenience. Choose energy-efficient bulbs for better results.
Handle bulbs with care. Avoid touching them with bare hands to prevent damage.
- Turn off power before replacing bulbs
- Use a ladder for hard-to-reach fixtures
- Dispose of old bulbs responsibly
Troubleshooting Common Issues
Problems can arise with wall art lighting. Identify issues quickly to maintain lighting efficiency. Common problems include flickering or dimming lights.
Check connections if lights flicker. Loose wires can cause instability. Replace faulty components as needed.
- Ensure power supply is stable
- Inspect switches for proper function
- Consult a professional if problems persist

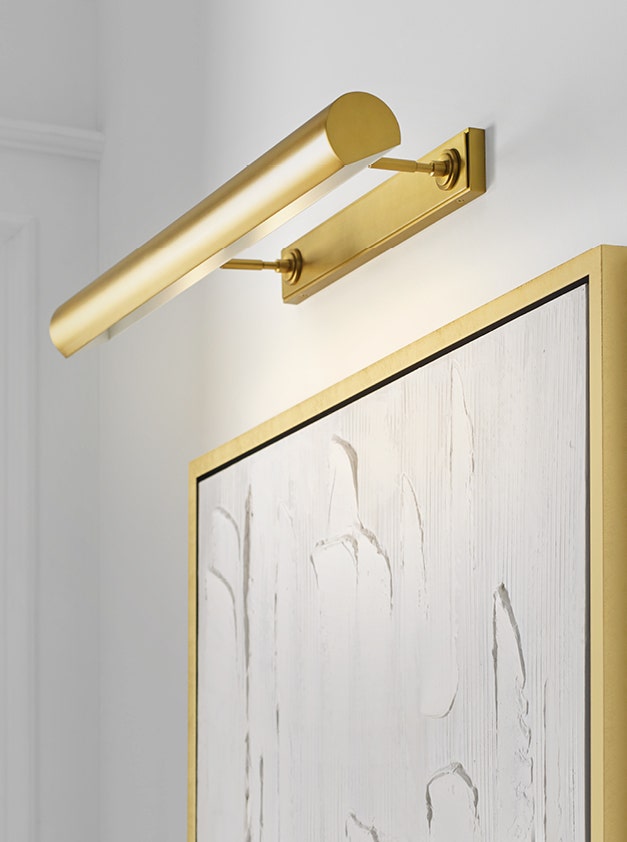
Credit: www.architecturaldigest.com
Frequently Asked Questions
How High Should Wall Art Lighting Be Placed?
Wall art lighting should be placed 6 to 8 feet above the floor. This height ensures even illumination and highlights the artwork effectively. Adjust placement based on ceiling height and artwork size for best results.
What Type Of Lighting Is Best For Wall Art?
LED spotlights or track lighting are ideal for wall art. They provide focused, adjustable light without heat damage. Choose warm white bulbs to enhance colors and textures naturally.
Should Wall Art Lighting Be Angled?
Yes, angle lighting at 30 degrees to reduce glare and shadows. This angle evenly lights the artwork and enhances details without creating reflections.
Can Natural Light Replace Wall Art Lighting?
Natural light can complement but not replace dedicated wall art lighting. It varies throughout the day and may cause fading. Use artificial lighting for consistent, controlled illumination.
Conclusion
Proper lighting brings wall art to life and adds charm to any room. Place lights at the right angle to avoid glare and shadows. Choose soft, warm bulbs to highlight colors and details. Test different positions before fixing lights permanently.
Small changes can create big effects. Enjoy how your art shines and creates a cozy space. Bright walls, happy walls.