Are you ready to transform your hallway with a stunning chandelier but unsure where to start? Choosing the perfect spot for your DIY hallway chandelier can completely change the look and feel of your space.
The right placement not only highlights your style but also creates a warm, inviting atmosphere every time you walk through. You’ll discover easy, practical tips to find the ideal chandelier spot that fits your hallway’s size and shape. Keep reading, and you’ll soon have the confidence to brighten up your home like a pro!
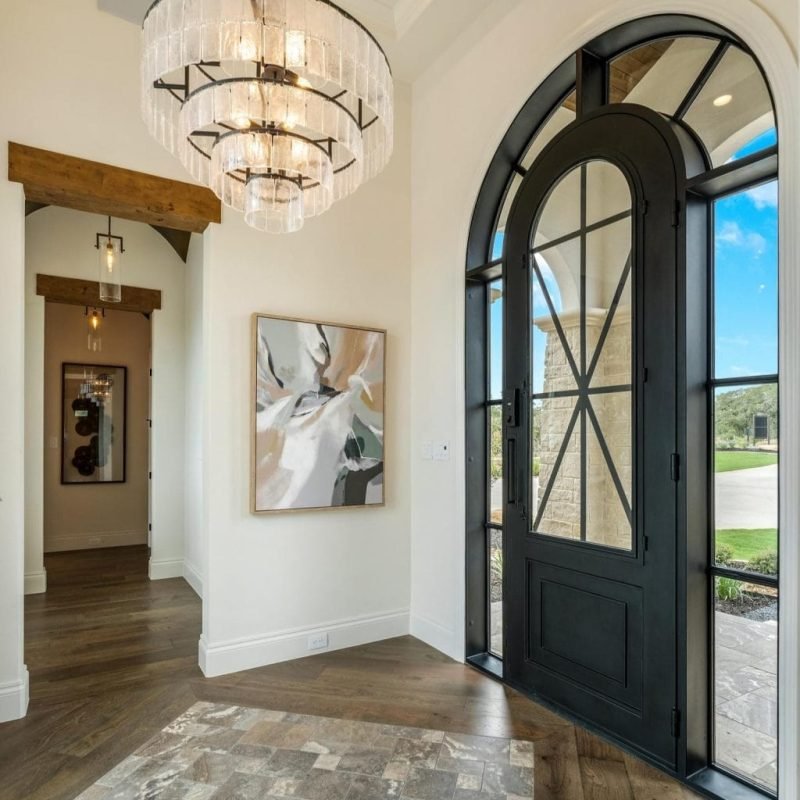
Credit: stylecurator.com.au
Choosing The Right Chandelier
Choosing a chandelier for your hallway can change the whole look. It adds style and light to this often-used space. You need to think about size, style, and lighting to find the right one.
This guide will help you pick a chandelier that fits well and lights your hallway perfectly.
Size And Scale Considerations
Size matters when picking a chandelier for the hallway. Too big or too small can look odd. Measure your hallway’s width and height first. The chandelier should be proportional to these numbers.
- Choose a chandelier width that is about one-half to two-thirds the width of the hallway.
- For hallways with low ceilings, select a flush mount or a smaller hanging fixture.
- Leave at least seven feet of clearance from the floor to the bottom of the chandelier.
Style And Design Matching
Pick a chandelier that fits the style of your home and hallway. The design should match your decor. Classic homes look best with traditional chandeliers. Modern homes suit sleek or minimal styles.
| Home Style | Chandelier Style |
| Traditional | Crystal, ornate metalwork |
| Modern | Clean lines, geometric shapes |
| Rustic | Wood, wrought iron |
| Minimalist | Simple, small fixtures |
Lighting Needs And Bulb Types
Good lighting is key in a hallway. It should be bright enough for safety but soft enough to feel welcoming. Choose bulbs that fit your chandelier and lighting needs.
- LED bulbs save energy and last longer.
- Warm white bulbs create a cozy atmosphere.
- Dimmable bulbs let you adjust brightness as needed.
- Check the chandelier’s maximum wattage before buying bulbs.
Measuring Your Hallway Space
Choosing the right chandelier starts with measuring your hallway space. Accurate measurements help you find a fixture that fits well and looks balanced.
Focus on three key areas: ceiling height, hallway width and length, and the best position for your chandelier.
Ceiling Height And Fixture Proportions
Measure the ceiling height to decide the chandelier’s size and hanging length. A tall ceiling allows for larger or longer fixtures.
Keep at least 7 feet of clearance from the floor to the bottom of the chandelier. This prevents head bumps and keeps the space comfortable.
Width And Length Guidelines
Use the hallway’s width and length to find the right chandelier size. The fixture should be proportional to the space.
| Hallway Width (feet) | Chandelier Width (inches) |
| 3-4 | 10-15 |
| 5-6 | 16-22 |
| 7-8 | 23-28 |
| 9+ | 29-36 |
The chandelier’s width should not be wider than two-thirds of the hallway width. Keep the fixture smaller in narrow spaces.
Positioning For Optimal Effect
Place the chandelier where it centers in the hallway. This helps balance light and creates a welcoming look.
- Measure the hallway’s length to find the midpoint.
- Mark the ceiling at this center point for the chandelier hook.
- Avoid placing the fixture too close to doors or walls.
- Consider aligning the chandelier with other features like runners or artwork.
Installation Tips For Diy
Installing a hallway chandelier yourself can add charm to your home. It also saves money.
Follow these tips to place your chandelier safely and correctly.
Tools And Materials Needed
You need specific tools and materials to install a chandelier safely. Gather everything before you start.
- Voltage tester to check power
- Wire strippers for electrical wires
- Screwdrivers (flat and Phillips head)
- Drill with bits for mounting
- Measuring tape to position the chandelier
- Wire nuts for safe connections
- Chandelier mounting bracket
- Electrical tape for insulation
- Step ladder for reaching the ceiling
- Safety glasses and gloves
Safety Precautions
Safety is very important when working with electricity. Take these steps to protect yourself.
- Turn off power at the circuit breaker before starting
- Use a voltage tester to confirm no electricity flows
- Wear safety glasses and gloves
- Keep your work area dry and clean
- Use a stable ladder and avoid overreaching
- Do not install if you feel unsure about electrical work
Step-by-step Installation Process
Follow these steps carefully to install your hallway chandelier correctly.
- Turn off the power supply at the breaker box.
- Remove the old light fixture if one exists.
- Check the electrical box to ensure it supports the chandelier’s weight.
- Attach the mounting bracket to the electrical box.
- Connect the chandelier wires to the house wires: black to black, white to white, green or copper to ground.
- Secure wire connections with wire nuts and wrap with electrical tape.
- Attach the chandelier to the mounting bracket.
- Adjust the height or chain length as needed.
- Install the bulbs and any decorative parts.
- Turn the power back on and test the light.
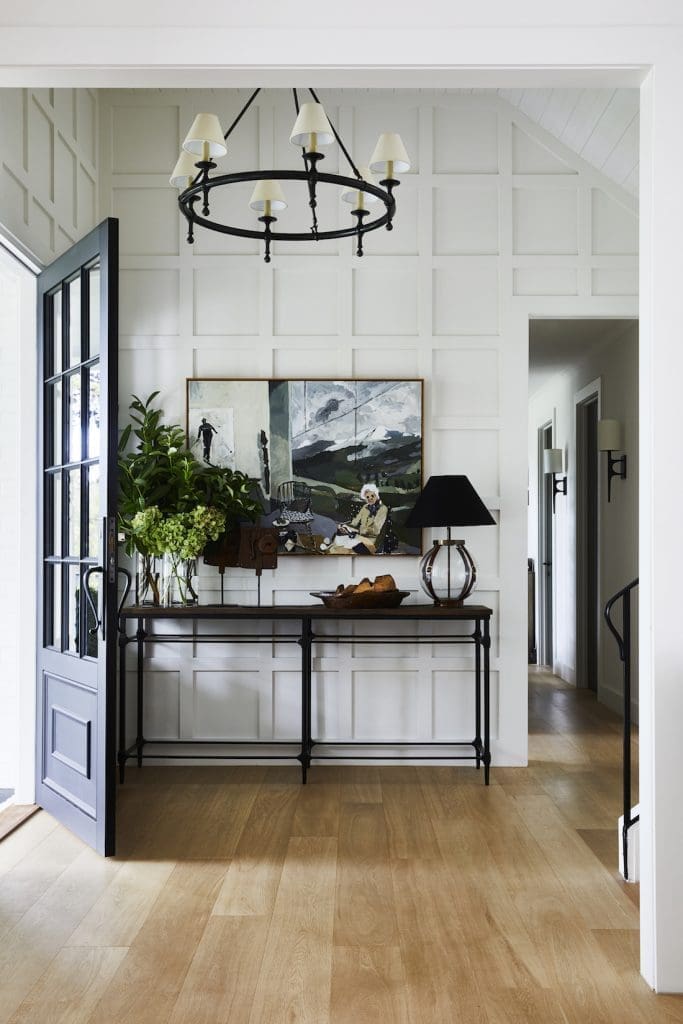
Credit: archipro.com.au
Creative Placement Ideas
Choosing where to place a hallway chandelier changes the room’s look. Good placement adds style and light.
Try different ideas to find the best spot for your chandelier. This guide shows creative placement options.
Centered Vs. Offset Placement
Centered chandeliers hang in the middle of the hallway. This creates balance and draws attention.
Offset placement puts the chandelier to one side. This adds interest and suits uneven hallways.
- Centered placement works well in symmetrical spaces
- Offset placement fits hallways with doors or art on one side
- Use offset to highlight special features like a console table
Multiple Chandeliers For Long Hallways
Long hallways can use several small chandeliers instead of one large light.
Spacing multiple chandeliers evenly brightens the entire space and adds style.
- Choose chandeliers with matching style but smaller size
- Place lights at equal distances for uniform brightness
- Use dimmable bulbs to adjust light levels as needed
Layered Lighting Effects
Combine chandeliers with wall sconces or recessed lights for layered lighting.
This mix creates depth and lets you control the mood in your hallway.
- Chandeliers provide general lighting
- Wall sconces add accent light and highlight artwork
- Recessed lights fill dark spots without cluttering the ceiling
Enhancing Ambiance With Chandeliers
Chandeliers can change the mood of your hallway. The right placement and lighting create a warm and welcoming space.
Small changes like dimmers and wall fixtures add style and control. Color temperature also affects the feel of the room.
Using Dimmer Switches
Dimmer switches let you adjust the chandelier light level. You can set bright light for cleaning or soft light for relaxing.
- Install a dimmer switch compatible with your chandelier.
- Use dimmers to control brightness throughout the day.
- Lower light at night to create a calm atmosphere.
- Adjust light for special occasions or guests.
Complementary Wall Fixtures
Wall fixtures add extra light and style next to the chandelier. They balance the hallway lighting and highlight decor.
| Type of Fixture | Placement | Effect |
|---|---|---|
| Sconces | Along the hallway walls | Soft light and shadows |
| Picture Lights | Above artwork | Focused light on details |
| LED Strips | Under shelves or moldings | Subtle glow and accent |
Color Temperature Effects
Color temperature changes how light feels in the hallway. Warm light feels cozy, cool light feels bright and fresh.
Here are common color temperatures for chandeliers:
- 2700K – 3000K:Warm white, soft and inviting
- 3500K – 4100K:Neutral white, clear and natural
- 5000K – 6500K:Cool white, crisp and energetic
Budget-friendly Chandelier Projects
Creating a chandelier on a budget can be fun and rewarding. With some creativity, you can light up your hallway without breaking the bank.
This guide will explore ways to craft unique chandeliers using affordable materials. Let’s dive into the art of DIY chandelier projects!
Repurposing Vintage Fixtures
Old fixtures can be transformed into beautiful chandeliers. Look for vintage lamps at thrift stores or garage sales.
Consider these tips for repurposing:
- Inspect the wiring for safety.
- Clean and polish the surface for a fresh look.
- Add new bulbs to enhance brightness.
Diy Chandelier Crafting Ideas
Crafting your chandelier is a great way to showcase your style. Use materials like beads, mason jars, or even paper.
- Choose a base structure like a hoop or frame.
- Attach your decorative materials securely.
- Ensure balanced weight distribution for safety.
Affordable Lighting Alternatives
If crafting isn’t your thing, consider affordable alternatives. These options can brighten your space without a hefty price tag.
| Alternative | Cost Range |
| String lights | $10 – $30 |
| Lanterns | $15 – $40 |
| Battery-powered LEDs | $5 – $25 |
Maintaining And Cleaning Chandeliers
Chandeliers add elegance to any hallway. They need regular care to stay bright and beautiful. Learn how to maintain and clean your chandelier effectively.
This guide will cover routine cleaning, handling fragile parts, and solving common issues. Keep your chandelier shining with these tips.
Routine Cleaning Tips
Regular cleaning keeps chandeliers dust-free and sparkling. Follow these steps to maintain their shine.
- Dust the chandelier weekly with a soft cloth.
- Use a mild glass cleaner once a month.
- Always turn off the light and let bulbs cool before cleaning.
Handling Fragile Components
Chandeliers have delicate parts that need careful handling. Protect them during cleaning and maintenance.
| Component | Handling Tip |
| Crystals | Remove gently to clean |
| Bulbs | Twist carefully to replace |
| Arms | Support while cleaning |
Troubleshooting Common Issues
Sometimes chandeliers have problems. These tips help you fix them easily.
Solution:Check bulb connections and replace if needed.
Solution:Clean with a soft, dry cloth regularly.

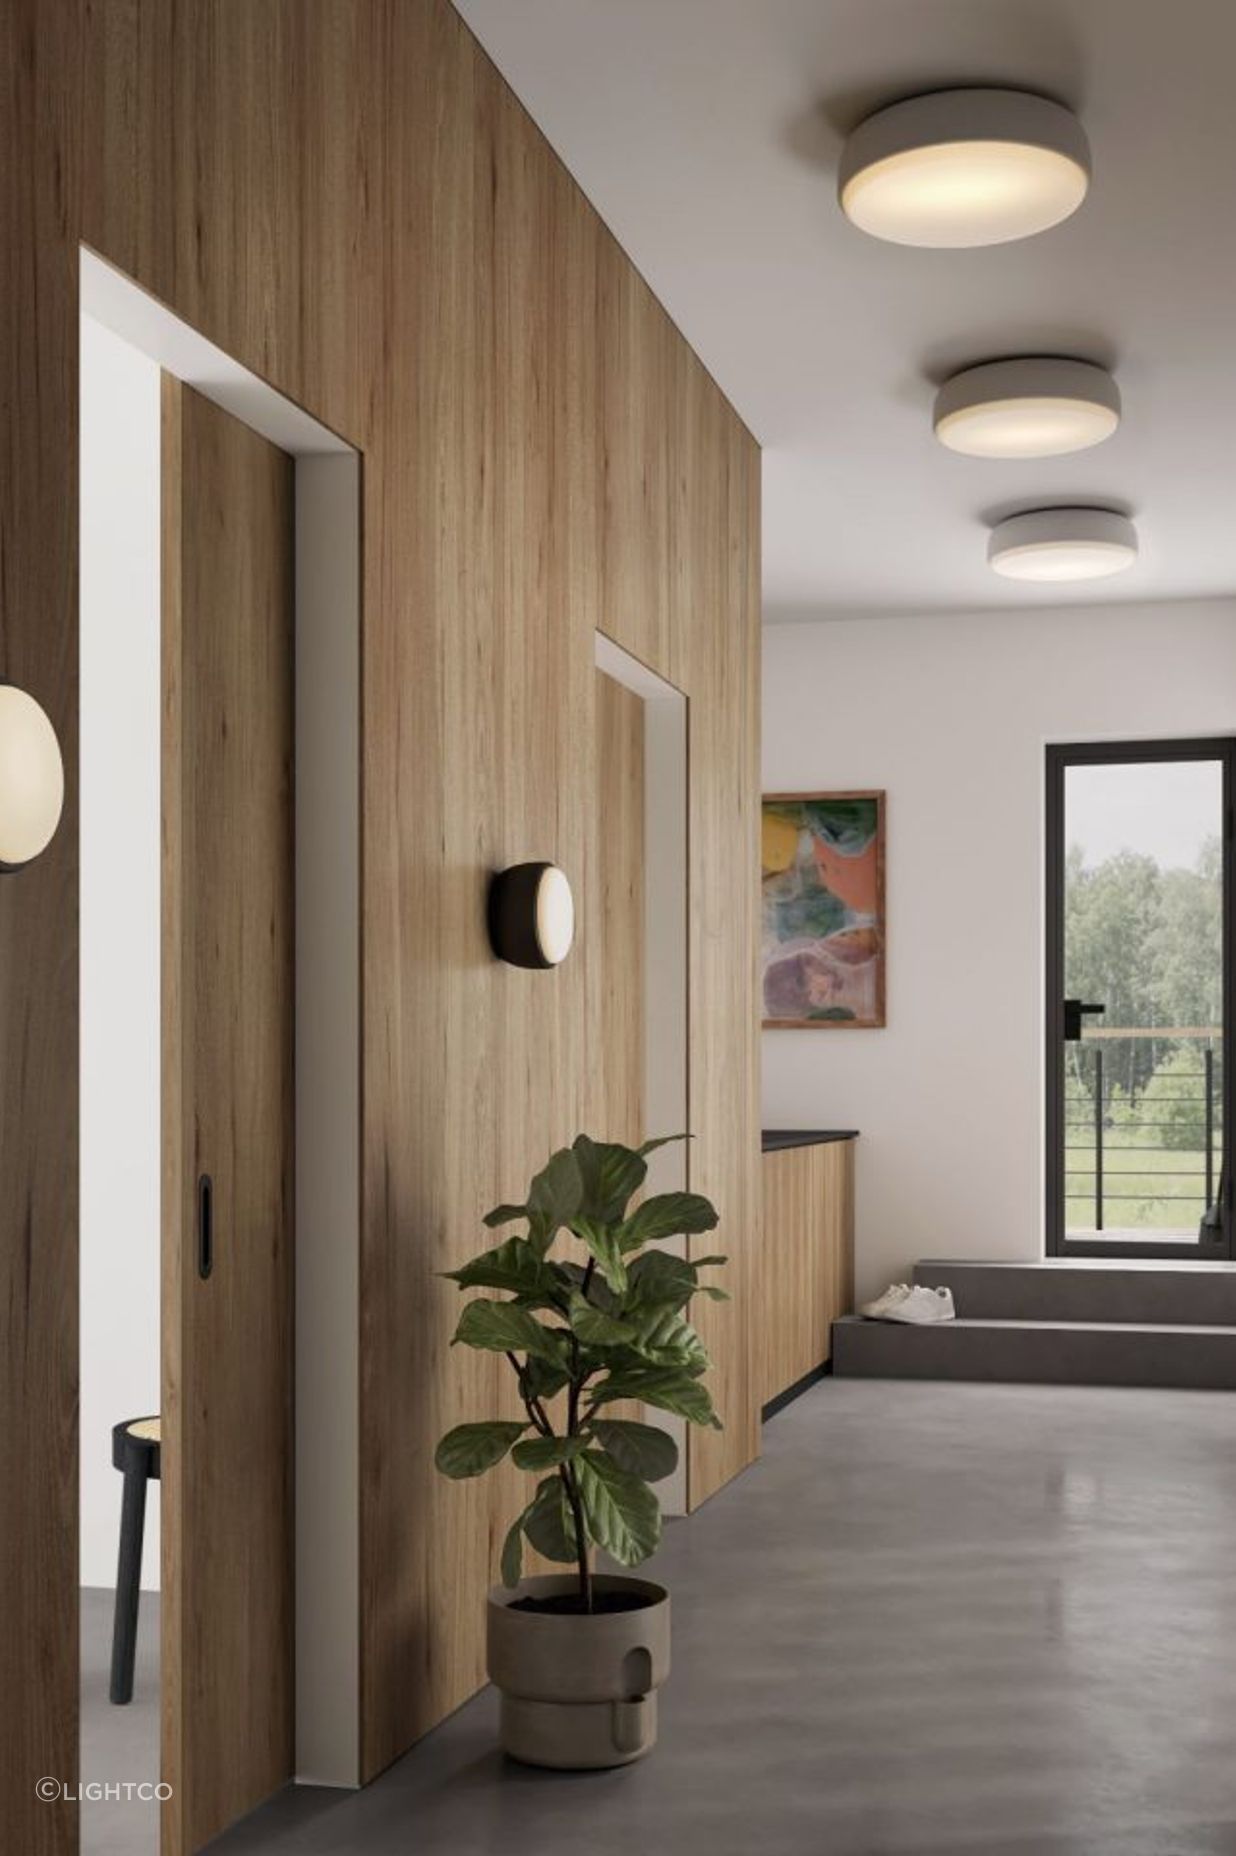
Credit: www.reddit.com
Frequently Asked Questions
How Do I Choose The Right Size Chandelier For My Hallway?
Select a chandelier width about one-half to two-thirds the hallway width. This ensures balance and proper scale in the space. A chandelier too large overwhelms, while too small lacks impact. Measure carefully before purchasing to achieve the best aesthetic and lighting effect.
What Is The Ideal Height For Hallway Chandelier Placement?
Hang the chandelier so its bottom is 7 feet above the floor. This height prevents head bumps and provides ample light. Adjust slightly based on ceiling height and hallway width. Maintaining proper clearance ensures safety and enhances the chandelier’s visual appeal.
Can I Install A Diy Hallway Chandelier Without Professional Help?
Yes, if you have basic electrical knowledge and proper tools, DIY installation is possible. Always turn off power at the breaker before starting. Follow the manufacturer’s instructions closely. When in doubt, consult a professional to ensure safety and code compliance.
What Style Chandelier Suits Narrow Hallways Best?
Opt for slim, elongated chandeliers or linear pendants in narrow hallways. These shapes complement limited space and provide ample lighting without crowding. Avoid bulky or oversized fixtures that can overwhelm tight areas. Choose styles that match your hallway’s décor for a cohesive look.
Conclusion
Choosing the right spot for your hallway chandelier makes a big difference. It brightens the space and adds style. Measure your hallway and think about ceiling height first. Center the light for balance and safety. Small changes can create a warm, inviting path.
Try different ideas to find what feels best. Enjoy the glow and charm your new chandelier brings. Your hallway can look fresh and welcoming with just a little effort. Keep it simple, bright, and beautiful.