Easter is just around the corner, and there’s no better way to celebrate than by decorating your own Easter eggs. Imagine turning plain eggs into colorful, fun works of art that brighten up your home and bring smiles to everyone around you.
Whether you’re crafting with kids or looking for a relaxing project, these DIY Easter egg decoration ideas are perfect for you. Ready to discover simple, creative techniques that make your eggs stand out? Keep reading, and let’s make this Easter truly special with your own unique designs!
Materials You’ll Need
Decorating Easter eggs is a fun and creative activity. To get started, you need some basic materials. These supplies help you create beautiful, colorful eggs.
Besides the basics, you can add extra items to make your eggs stand out. These optional decorations add texture and shine.
Basic Supplies
Gather these basic supplies before starting your egg decoration project. They are easy to find and essential for most techniques.
- White or brown eggs (hard-boiled or blown out)
- Food coloring or egg dye kits
- Vinegar (helps colors stick)
- Water (for mixing dyes)
- Bowls or cups for dye
- Spoons or tongs to handle eggs
- Paper towels or drying rack
- Newspaper or plastic sheet to protect surfaces
Optional Decorative Items
Use these optional items to add details and unique effects. You can mix and match them to fit your style.
| Item | Purpose |
| Glitter | Add sparkle and shine |
| Stickers | Create patterns or shapes |
| Markers or paint pens | Draw fine details |
| Ribbon or yarn | Wrap around eggs for texture |
| Sequins or beads | Glue on for decoration |
| Wax crayons | Make resist patterns before dyeing |
Classic Dye Techniques
Dyeing Easter eggs is a fun and easy tradition. You can create bright colors using simple methods.
Classic dye techniques include using food coloring and natural dyes. These methods give eggs beautiful and unique colors.
Using Food Coloring
Food coloring is one of the easiest ways to dye Easter eggs. It is safe, quick, and gives vibrant colors.
- Mix 1 cup of hot water with 1 teaspoon of vinegar.
- Add 10-20 drops of food coloring to the mixture.
- Dip the eggs into the colored water for 5 minutes.
- Remove and let the eggs dry on a rack or paper towel.
- Use gloves to avoid staining your hands.
Natural Dye Options
Natural dyes come from plants, fruits, and vegetables. They offer soft and earthy colors.
| Ingredient | Color | Preparation |
| Beets | Pink to Red | Boil chopped beets in water for 30 minutes |
| Red Cabbage | Blue to Purple | Boil chopped cabbage in water for 30 minutes |
| Turmeric | Yellow | Simmer ground turmeric in water for 15 minutes |
| Onion Skins | Orange to Brown | Boil onion skins in water for 30 minutes |
Painting And Drawing Ideas
Decorating Easter eggs with paint and drawings is a fun activity for all ages. It lets you create colorful and unique designs.
Try different painting styles and drawing techniques to make your eggs stand out. Use simple tools like brushes and markers.
Watercolor Effects
Watercolor paint gives eggs a soft and delicate look. The colors blend gently for a dreamy finish.
Use a wet brush to apply light layers of color. Let each layer dry before adding more for a smooth effect.
- Choose pastel shades for a gentle look
- Use a sponge to dab colors softly
- Try mixing colors for interesting blends
- Seal the eggs with clear varnish to keep colors fresh
Sharpie Designs
Sharpie markers let you draw clear and detailed designs on eggs. They come in many bright colors.
Draw patterns like dots, stripes, and flowers. You can also write messages or names on the eggs.
- Use fine-tip markers for small details
- Try geometric shapes for a modern look
- Mix colors to create bold contrasts
- Draw freehand or use stencils for accuracy
Creative Wrapping And Textures
Decorating Easter eggs can be fun with different wrapping and texture ideas. These techniques give your eggs a unique look. You can use simple materials to create beautiful designs.
Two easy and creative ways to decorate are using tissue paper and adding glitter or sequins. Both add color and shine to your eggs.
Using Tissue Paper
Tissue paper adds soft colors and texture to your Easter eggs. You can wrap the eggs or tear the paper into small pieces and glue them on.
- Choose thin tissue paper in your favorite colors.
- Cut or tear the paper into small shapes or strips.
- Brush glue gently on the egg surface.
- Place tissue paper pieces carefully on the glue.
- Let the egg dry completely before handling.
- For a smooth finish, cover with a thin layer of clear glue or varnish.
Adding Glitter And Sequins
Glitter and sequins give your Easter eggs sparkle and shine. You can create patterns or cover the whole egg with glitter or sequins.
| Material | How to Use | Effect |
| Fine Glitter | Brush glue, sprinkle glitter, shake off extra | Soft sparkle |
| Chunky Glitter | Glue larger areas, press glitter, let dry | Bold texture |
| Sequins | Glue sequins one by one or in patterns | Bright shine and dimension |
| Glitter Glue | Apply directly with brush or tip | Easy glitter effect |
Unique Egg Decorating Styles
Decorating Easter eggs can be fun and creative. You can try many styles to make your eggs stand out. Different techniques give your eggs a special look.
Here are three unique styles to inspire your next Easter project. Each style has its own charm and easy steps to follow.
Marbled Eggs
Marbled eggs have a swirl of colors that look like stone or marble. This style uses oil and water to create the patterns. It is a simple way to make each egg one of a kind.
- Fill a bowl with water and add drops of oil-based paint or nail polish.
- Swirl the colors gently with a toothpick or stick.
- Dip the egg slowly into the bowl, letting the colors stick to its surface.
- Lift the egg out and let it dry on a rack or paper towel.
Ombre Coloring
Ombre eggs fade from one color to another smoothly. This style uses light to dark shades of the same color. It gives a soft and elegant look to the eggs.
| Shade | How to Create |
| Light | Dip egg briefly in diluted dye |
| Medium | Dip egg longer in regular dye |
| Dark | Dip egg longest in concentrated dye |
Geometric Patterns
Geometric patterns use shapes like triangles, squares, and lines. You can draw or tape these shapes on eggs before coloring. The result is a modern and bold design.
Try these ideas for geometric patterns:
- Use painter’s tape to block off triangle shapes.
- Draw stripes with a fine marker after dyeing eggs.
- Create dots with a small brush and contrasting paint color.

Credit: www.linesacross.com
Kids-friendly Projects
Decorating Easter eggs is a fun activity for kids. It sparks creativity and joy. These projects are easy and safe.
Kids can use simple materials to make colorful and unique designs. These ideas will keep them entertained and engaged.
Sticker And Stamp Ideas
Stickers and stamps are perfect for decorating Easter eggs. They are easy to use and create beautiful patterns.
Kids can choose their favorite stickers, like stars or animals. Stamps can add fun shapes like hearts or flowers.
- Choose stickers with bright colors
- Use non-toxic ink for stamps
- Mix and match designs for variety
Simple Tape Resist Designs
Tape resist designs are simple and creative. Kids place tape on eggs to make patterns.
After applying paint, they peel the tape away. This reveals unique designs and shapes.
- Use painter’s tape for easy removal
- Try zig-zag or stripe patterns
- Choose bright paints for contrast
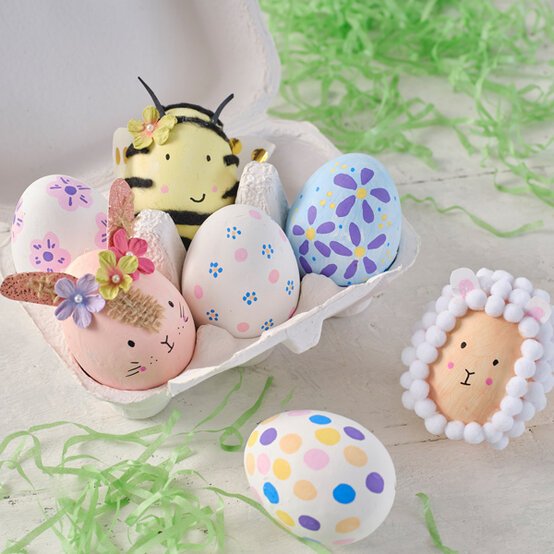
Display And Gift Tips
Diy Easter egg decorations are fun to create and share. These projects can brighten any display or become special gifts.
Use creative ideas to make your Easter eggs stand out. Here are some tips for displaying and gifting your decorated eggs.
Creative Egg Holders
Displaying your Easter eggs can be as creative as decorating them. Use unique egg holders to enhance their beauty.
- Use egg cups with vibrant colors
- Place eggs in small nests made from twigs
- Craft holders from clay or paper mache
Packaging For Gifts
Gift your decorated eggs in beautiful packaging. It adds a special touch and makes your gift more memorable.
| Packaging Idea | Description |
| Decorative Baskets | Fill with grass or shredded paper |
| Gift Boxes | Wrap with colorful paper and ribbons |
| Cellophane Bags | Tie with a bow for a simple look |
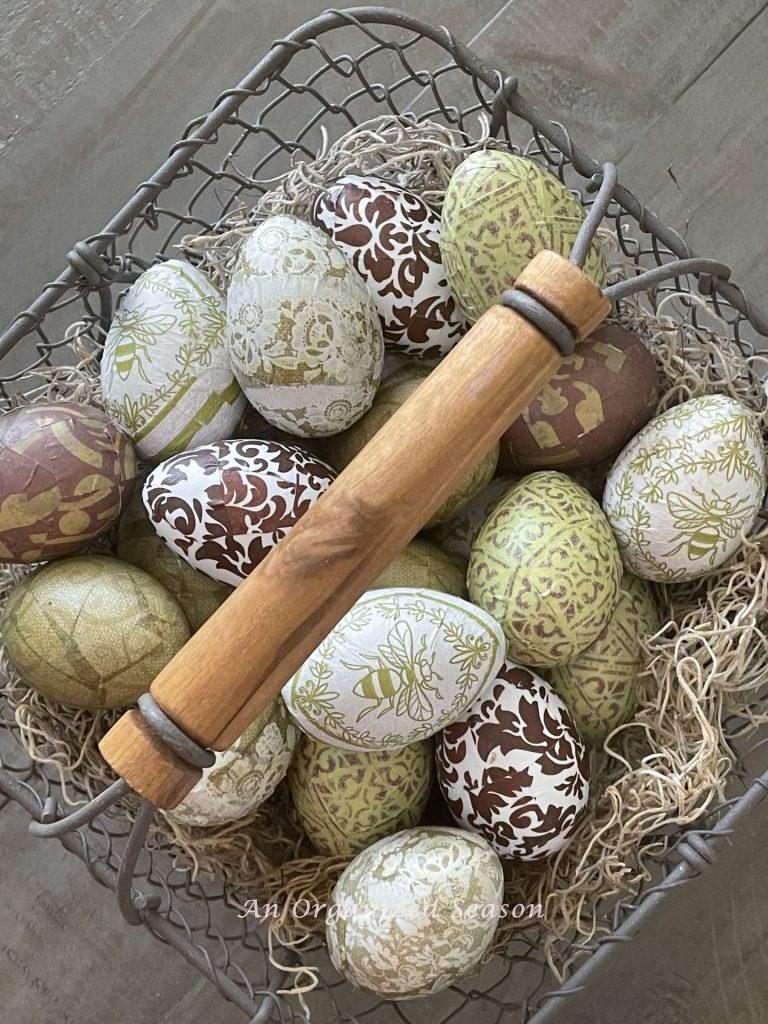
Credit: anorganizedseason.com

Credit: www.hgtv.com
Frequently Asked Questions
What Materials Are Needed For Diy Easter Egg Decoration?
You need eggs, dye, paint, brushes, stickers, glitter, and glue. Optional items include ribbons, markers, and stencils. Always use non-toxic, safe materials for kids. Preparing hard-boiled or blown-out eggs is essential before decorating.
How Can I Make Easter Eggs Look Unique And Creative?
Try combining different techniques like dyeing, painting, and adding stickers. Use natural dyes from vegetables or spices for unique colors. Experiment with patterns such as stripes, polka dots, or floral designs. Adding textures like glitter or ribbons enhances creativity.
What Are Easy Diy Easter Egg Projects For Kids?
Simple projects include coloring with markers, applying stickers, or using washable paints. Kids can also create patterns with rubber bands before dyeing. Safety is key, so supervise children and use non-toxic supplies to ensure fun and safe crafting.
How To Preserve Decorated Easter Eggs Longer?
Use hard-boiled eggs and handle them gently to avoid cracks. Apply a clear varnish or sealant to protect paint and decorations. Store eggs in a cool, dry place away from direct sunlight. Avoid moisture to prevent mold or spoilage.
Conclusion
DIY Easter egg decoration projects bring fun and joy to the holiday. They let you be creative with simple materials at home. Everyone can join, from kids to adults, making great memories. These projects make your Easter celebration colorful and special.
Try different designs and colors to find your favorite style. Keep supplies ready and enjoy decorating with family and friends. Easter eggs show your care and add a festive touch. Start small, have fun, and enjoy the creative process. Celebrate Easter with your own unique and cheerful eggs.