
Setting up a bedroom home studio can feel overwhelming, but it doesn’t have to be. Imagine having a creative space right in your room where your ideas come to life without distractions or expensive gear.
You’re about to discover simple steps to build a studio that fits your space, budget, and style. Whether you want to record music, podcasts, or videos, this guide will help you create a setup that works perfectly for you. Ready to turn your bedroom into the creative hub you’ve always wanted?
Let’s dive in.
Choosing The Right Room
Setting up a bedroom home studio starts with picking the right room. This choice affects sound quality and comfort.
Focus on space, noise levels, and air flow to create a good working spot.
Room Size And Shape
Choose a room big enough for your gear and movement. Small rooms can feel crowded and limit creativity.
Square or rectangular rooms work best. Odd shapes can cause sound problems.
- Ideal size: 100 to 200 square feet
- Long, narrow rooms help reduce sound reflections
- Avoid rooms with many corners or angles
Noise Considerations
Pick a quiet room with little outside noise. Noise makes recording hard and distracting.
Rooms away from streets and noisy neighbors work best. Check for sounds from appliances or heating.
- Use thick doors and windows to block noise
- Consider adding soundproofing panels
- Turn off noisy devices during recording
Lighting And Ventilation
Good lighting helps you work comfortably. Natural light is best but avoid direct sunlight on screens.
Proper ventilation keeps air fresh. Stuffy rooms cause fatigue and reduce focus.
- Use curtains or blinds to control sunlight
- Add lamps for consistent lighting
- Use fans or open windows for airflow

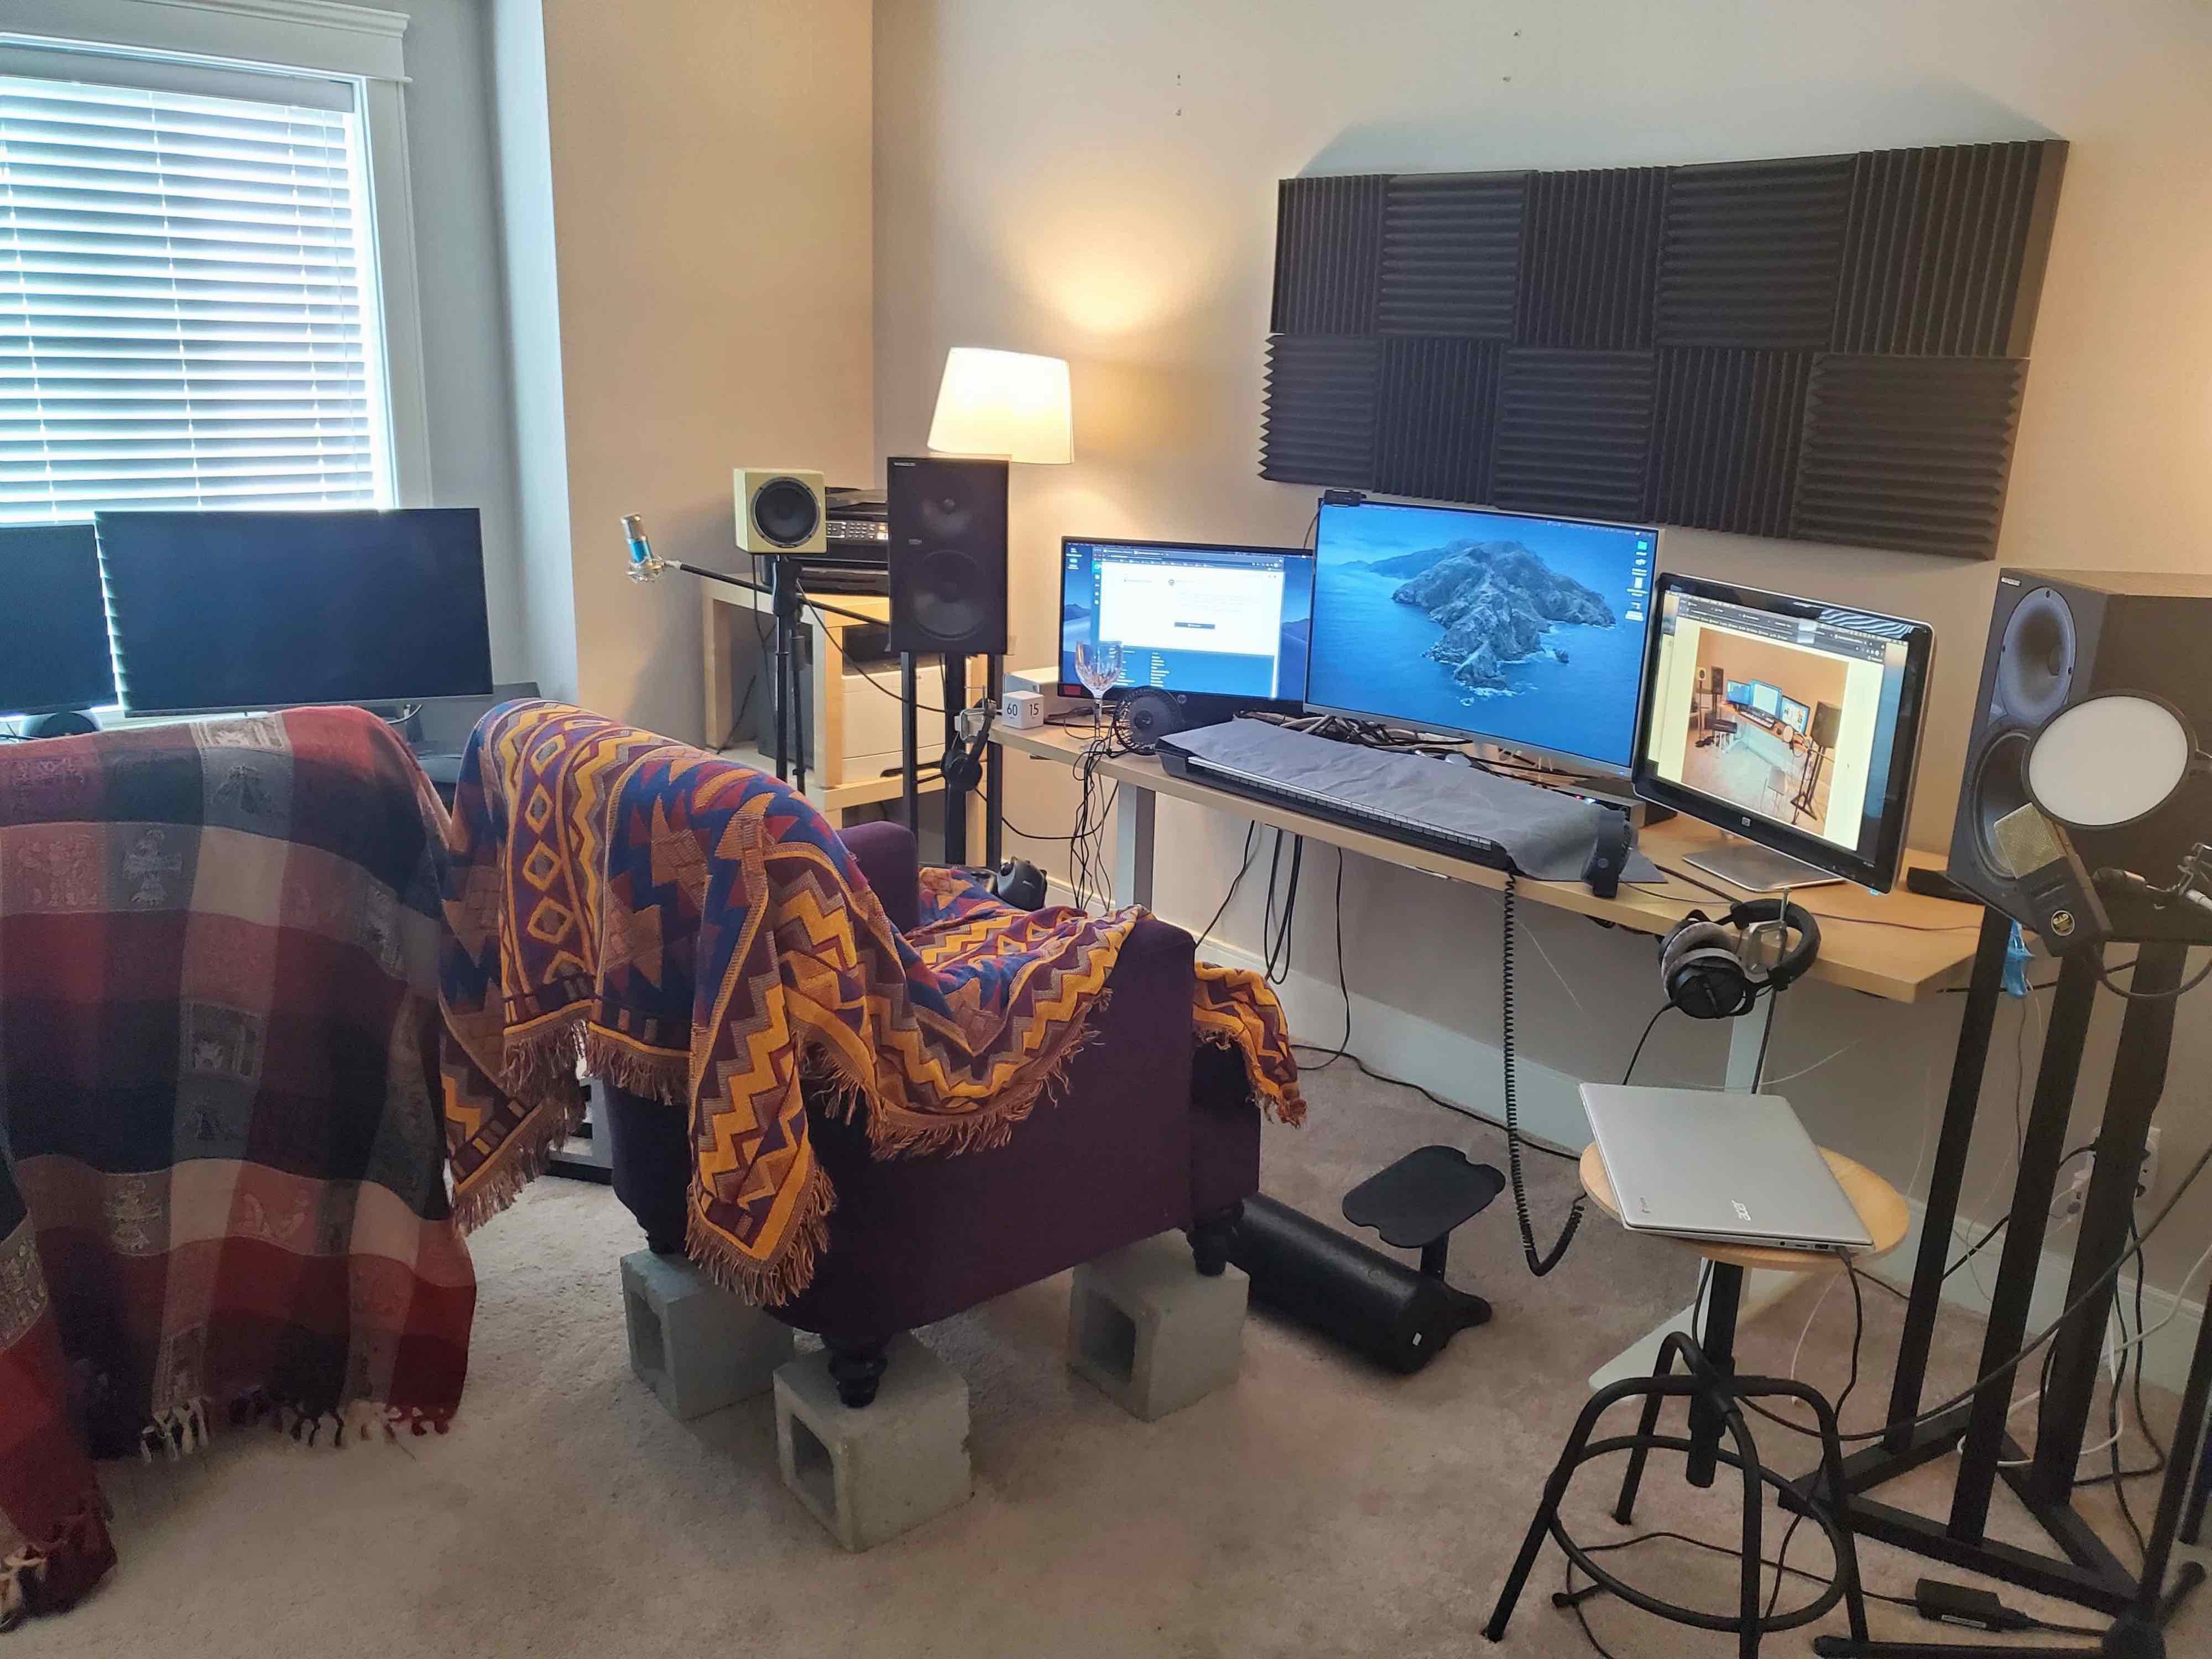
Credit: www.reddit.com
Acoustic Treatment Basics
Setting up a bedroom home studio needs good sound control. Acoustic treatment helps make your recordings clear. It reduces echoes and unwanted noise.
Knowing the basics of acoustic treatment helps you create a better listening space. You can use simple materials and smart placement to improve sound quality.
Sound Absorption Materials
Sound absorption materials stop sound waves from bouncing around. They reduce echoes and improve sound clarity in your room. Common materials include foam panels, fiberglass, and mineral wool.
- Acoustic foam panels absorb mid and high frequencies.
- Fiberglass panels work well for a wide range of sounds.
- Mineral wool is dense and absorbs low and mid frequencies.
- Carpets and heavy curtains also help absorb sound.
Bass Traps Placement
Bass traps reduce low-frequency build-up. Bass waves gather in room corners, causing muddled sound. Place traps in corners to control these frequencies effectively.
| Placement Area | Effect |
| Room corners | Absorbs low bass frequencies |
| Wall-ceiling corners | Reduces flutter echoes and bass buildup |
| Behind speakers | Improves bass clarity and punch |
Diffusers And Reflection Control
Diffusers scatter sound waves to avoid harsh reflections. They keep the room lively without dead spots. Use diffusers on walls or ceilings opposite to your speakers.
- Place diffusers behind listening position.
- Use them on side walls for even sound spread.
- Avoid placing diffusers near bass traps.
- Combine diffusers with absorbers for best results.
Essential Studio Equipment
Setting up a bedroom home studio needs the right tools. Good equipment helps you record clear and true sound. It also makes mixing and editing easier.
This guide covers key gear to build your studio. Focus on audio interface, microphones, and monitors for best results.
Audio Interface Selection
An audio interface connects your instruments and microphones to your computer. It converts sound into digital signals for recording. Choose one with low latency and good preamps.
- Number of inputs and outputs you need
- USB or Thunderbolt connection
- Built-in headphone output
- Compatibility with your computer
- Clear and noise-free sound quality
Microphones For Bedroom Studios
Microphones capture your voice and instruments. For bedrooms, choose versatile mics that work well in small spaces. Condenser and dynamic microphones are common choices.
| Microphone Type | Best Use | Notes |
| Condenser | Vocals, acoustic instruments | Sensitive, needs quiet room |
| Dynamic | Drums, loud sources | Durable, less sensitive |
| USB | Simple recording | Plug and play, less flexible |
Studio Monitors And Headphones
Studio monitors and headphones let you hear your recordings clearly. Monitors show true sound in the room. Headphones help with detailed listening and mixing.
- Look for flat frequency response
- Choose monitors sized for your room
- Use closed-back headphones for recording
- Use open-back headphones for mixing

Credit: www.reddit.com
Desk And Furniture Setup
Setting up a bedroom home studio needs careful planning. Choosing the right desk and furniture is key for comfort and productivity.
A well-organized workspace helps you focus better. It also makes your studio look more professional and inviting.
Ergonomic Desk Choices
An ergonomic desk reduces strain on your body. Pick a desk that suits your height and space needs.
Adjustable desks are great for switching between sitting and standing. They help reduce fatigue during long working hours.
- Choose a desk with adjustable height
- Ensure enough legroom for comfort
- Consider a desk with built-in cable management
Monitor And Speaker Placement
Placing monitors at eye level prevents neck strain. Keep speakers at ear level for balanced sound.
Position your monitor about an arm’s length away. This helps reduce eye strain while working.
- Set monitors at eye level
- Speakers should be at ear level
- Keep a comfortable distance from screens
Cable Management Tips
Good cable management keeps your workspace tidy. Use cable ties to bundle loose cords together.
Labeling cables helps you find them quickly. This saves time when you need to unplug or rearrange devices.
- Use cable ties for bundling cords
- Label cables for easy identification
- Consider cable trays or covers
Optimizing Sound Isolation
Good sound isolation keeps outside noise out of your bedroom studio. It also stops your music from bothering others.
Using the right materials and techniques helps make your studio quieter. This improves your recording and listening quality.
Door And Window Treatments
Doors and windows are the main places where sound leaks. Adding special treatments reduces this problem.
Thick door seals and heavy curtains block sound from coming in or going out.
- Use weatherstripping around door edges
- Install door sweeps to seal gaps at the bottom
- Hang thick, heavy curtains over windows
- Consider double-glazed windows for better isolation
Floor And Ceiling Solutions
Floors and ceilings can carry sound between rooms. Adding layers helps block the noise.
Soft materials like rugs and acoustic panels reduce sound reflections and transmission.
- Place thick rugs or carpets on the floor
- Use floor underlays for extra sound dampening
- Hang acoustic panels or foam on the ceiling
- Consider adding a drop ceiling with sound-absorbing tiles
Diy Isolation Techniques
You can improve sound isolation with simple DIY projects. These save money and improve your space.
Using common materials, you can block gaps and absorb sound effectively.
- Fill cracks and gaps with weatherproof sealant
- Build window plugs from foam and plywood
- Create movable sound barriers with blankets or mattresses
- Use bookcases filled with books as sound absorbers
Lighting And Ambience
Good lighting changes the feel of your bedroom home studio. It helps you work better and feel relaxed.
Choosing the right lights and setting the mood can boost your creativity and comfort.
Mood Lighting Options
Mood lighting sets the tone for your studio. Soft lights make the room cozy and calm.
- Use dimmable LED bulbs to adjust brightness.
- Place colored lamps or smart bulbs for different moods.
- Add fairy lights for a warm, inviting glow.
- Try floor lamps with soft shades to reduce harsh light.
Reducing Screen Glare
Screen glare can cause eye strain and reduce focus. Managing light helps you see your screen clearly.
| Method | Benefit |
|---|---|
| Use adjustable blinds or curtains | Controls sunlight to avoid glare on screens |
| Position screens away from direct light | Reduces reflections and eye strain |
| Apply anti-glare screen protectors | Improves screen visibility in bright rooms |
| Choose matte screen finishes | Minimizes shiny spots on displays |
Incorporating Natural Light
Natural light brightens your space and lifts your mood. It is best to use it well in your studio.
Tips for using natural light:
- Place your desk near a window for daylight.
- Use sheer curtains to soften sunlight.
- Keep windows clean to let in more light.
- Arrange mirrors to reflect light around the room.
Tech Setup And Connectivity
Setting up a bedroom home studio requires good tech and smooth connectivity. Your gear must work well together to avoid delays.
This guide covers key areas like computer choices, MIDI gear, and network backup options. Each part helps your studio run better.
Computer And Software Choices
Choose a reliable computer that handles music software without lag. Both desktops and laptops can work well.
- Pick a computer with at least 8GB RAM and a fast processor.
- Use a digital audio workstation (DAW) that fits your style.
- Install essential plugins and virtual instruments.
- Keep software updated to avoid bugs.
Midi Controllers And Instruments
MIDI controllers help you play and record music digitally. Choose the right type for your workflow and space.
| Type | Description | Best For |
| Keyboard Controller | Keys like a piano | Melodies and chords |
| Pad Controller | Pads for beats | Drum patterns and samples |
| Control Surface | Knobs and sliders | Mixing and effects |
Networking And Backup Solutions
Keep your music files safe with a solid backup plan. Networking your devices speeds up file sharing.
- Use a wired or Wi-Fi network for device connections.
- Set up automatic backups to an external drive or cloud.
- Label and organize files clearly for easy access.
- Test backups regularly to confirm data safety.
Maintaining Your Studio Space
Keeping your bedroom studio clean and organized is important. It helps you stay productive and focused.
Regular maintenance ensures your equipment works well. It also keeps your space looking nice and tidy.
Cleaning And Upkeep
Dust and dirt can damage your equipment over time. Make sure to clean your studio regularly.
- Wipe surfaces with a damp cloth.
- Vacuum the floor to remove dust.
- Use compressed air to clean electronics.
Regular Calibration
Calibration keeps your equipment accurate. It’s essential for producing quality sound.
Consider setting a schedule for calibration. Regular checks prevent unwanted surprises.
Updating Equipment
Technology changes quickly. Keeping your equipment updated helps you stay current.
| Equipment | Update Frequency |
| Software | Monthly |
| Hardware | Yearly |
| Plugins | Every few months |
Credit: medium.com
Frequently Asked Questions
How To Choose The Best Equipment For A Bedroom Studio?
Focus on compact, high-quality gear that fits your space. Prioritize audio interfaces, studio monitors, and a good microphone. Budget-friendly and versatile options work well for beginners.
What Are Ideal Acoustic Treatments For A Bedroom Studio?
Use foam panels, bass traps, and diffusers to reduce echoes. Position them strategically on walls and corners for balanced sound. Soft furnishings can also help absorb unwanted noise.
How To Optimize Bedroom Studio Layout For Productivity?
Place your desk against a wall to save space. Keep monitors at ear level and form an equilateral triangle with your listening position. Maintain clear cable management for a tidy workspace.
Which Software Suits Bedroom Home Studio Recording?
Choose user-friendly DAWs like Ableton Live, FL Studio, or Logic Pro. These offer comprehensive tools for recording, editing, and mixing in small spaces.
Conclusion
Creating a bedroom home studio can be simple and fun. Choose the right gear that fits your space and needs. Keep your setup organized to work better and feel calm. Good sound quality makes a big difference in your recordings.
Spend time adjusting your space until it feels just right. Small changes can improve your music and creativity a lot. Enjoy making music in your own cozy corner. Your dream studio is closer than you think. Start with what you have and grow step by step.
