Your hallway is more than just a passage—it’s the first impression guests get when they step into your home. Imagine adding a stylish console table that fits perfectly with your space and personality.
You don’t have to spend a fortune or settle for something generic from the store. With a few simple DIY projects, you can create a hallway console table that’s both functional and beautiful. Ready to transform your hallway and impress everyone who walks through your door?
Keep reading, and you’ll discover easy, step-by-step ideas that anyone can tackle.

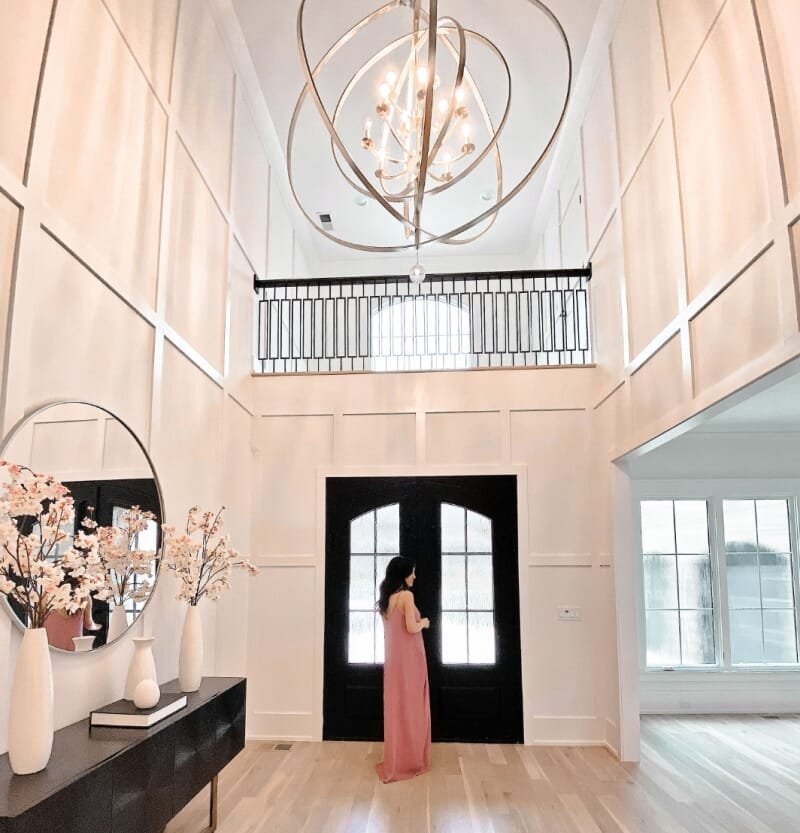
Credit: www.projectallendesigns.com
Choosing The Right Materials
Picking the right materials is key for a hallway console table. The materials affect the look, strength, and style.
Think about where the table will go and how you want it to feel. This helps you choose the best materials.
Wood Types And Finishes
Wood is a popular choice for console tables. It is strong and gives a warm, natural look.
Hardwoods like oak, maple, and walnut are very durable. Softwoods like pine are easier to work with but less strong.
- Oak: durable with a classic grain
- Maple: smooth and light-colored
- Walnut: rich color and strong
- Pine: affordable and easy to paint
Finishes protect the wood and add style. You can choose matte, glossy, or satin finishes.
Stains change the wood color but keep the grain visible. Paint covers the grain and adds color.
Metal And Glass Options
Metal and glass give a modern look to console tables. They can also make the table lighter.
Steel and iron are strong and can be shaped into different styles. Aluminum is light and resists rust.
- Steel: heavy and very strong
- Iron: classic and sturdy
- Aluminum: light and rust-proof
Glass tops add a sleek touch. They work well with metal bases and make small spaces feel bigger.
Repurposed And Upcycled Materials
Using repurposed materials can make your table unique and eco-friendly. Old wood, doors, or pallets can be reused.
Upcycling saves money and adds character. You can mix old materials with new ones for a fresh look.
- Old wood planks for a rustic feel
- Reclaimed doors as tabletops
- Pallet wood for a casual style
- Metal scraps for legs or accents

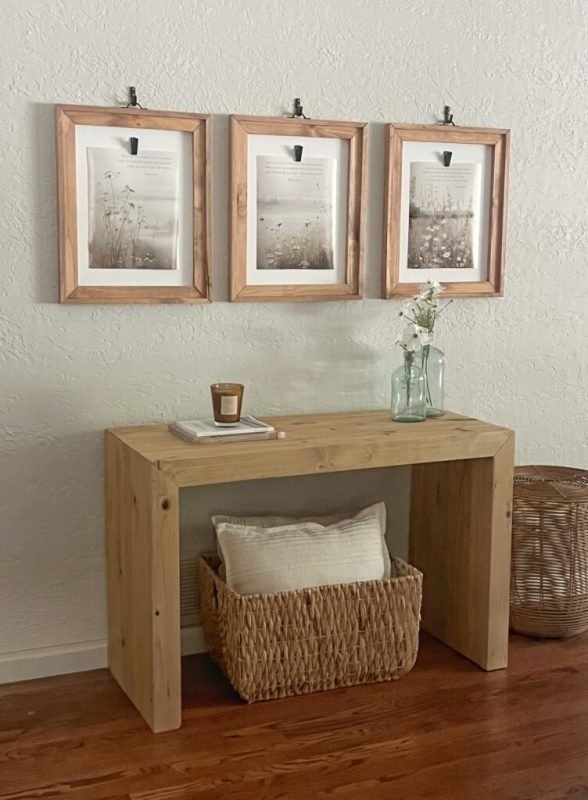
Credit: www.spryinterior.com
Design Styles To Inspire
A hallway console table adds style and function to narrow spaces. Choosing the right design can enhance your home’s look.
Explore these popular styles to find one that fits your taste and space.
Rustic Charm
Rustic charm uses natural wood with rough textures. It brings warmth and a cozy feel to your hallway.
Look for tables made from reclaimed wood or with distressed finishes.
Modern Minimalism
Modern minimalism focuses on clean lines and simple shapes. It keeps the hallway open and uncluttered.
- Choose tables with sleek metal or glass tops
- Pick neutral colors like white, black, or gray
- Use hidden storage to keep items out of sight
Industrial Edge
Industrial style mixes metal and wood for a bold look. It suits spaces with exposed brick or concrete walls.
| Material | Common Use | Look |
| Steel | Frame and legs | Strong and raw |
| Wood | Tabletop | Rough and natural |
| Leather | Drawer handles | Soft contrast |
Vintage Elegance
Vintage elegance uses classic shapes and fine details. It often features curved legs and ornate carvings.
Tip:Use soft pastel colors or rich wood stains for a vintage look. Add a small vase with fresh flowers.
Essential Tools And Supplies
Building a DIY hallway console table needs the right tools and materials. These help you work safely and get good results.
This guide covers the basic carpentry tools, painting and staining supplies, and hardware needed for your project.
Basic Carpentry Tools
Carpentry tools are the foundation of your project. They help you measure, cut, and assemble wood pieces accurately.
- Measuring tape to get exact dimensions
- Carpenter’s square for right angles
- Handsaw or circular saw for cutting wood
- Clamps to hold pieces in place
- Hammer for nails and adjustments
- Power drill for screws and holes
- Sandpaper or electric sander to smooth surfaces
Painting And Staining Supplies
Painting and staining give your table a nice look and protect the wood. Choose supplies that fit your finish style.
| Supply | Purpose |
| Paintbrushes | Apply paint or stain smoothly |
| Foam brushes | Good for even coats without streaks |
| Wood stain | Add color and show wood grain |
| Paint | Cover surfaces with solid color |
| Drop cloth | Protect floor and work area |
| Painter’s tape | Mask edges for clean lines |
| Rags | Wipe off excess stain or dust |
Hardware And Fasteners
Hardware holds your table parts together and adds style. Fasteners keep the structure strong and stable.
Key items include:
- Screws for tight joints
- Nails for quick fastening
- Wood glue for extra strength
- Drawer pulls or knobs if your table has drawers
- Brackets or corner braces for support
Step-by-step Build Guides
Building a hallway console table is a great way to add style and function to your space. These guides will help you create simple and useful tables. Each project fits different needs and spaces.
Follow the instructions carefully and gather your materials before you start. Safety is important, so use the right tools and wear protective gear.
Simple Floating Console
This floating console table is easy to build and looks clean. It saves floor space by mounting on the wall. You will need a wooden board, brackets, screws, and paint.
- Measure the wall space where you want to mount the table.
- Cut the wood board to the desired length and width.
- Sand the edges to make them smooth.
- Attach the brackets to the wall studs using screws.
- Secure the wooden board on the brackets.
- Paint or stain the table to match your decor.
- Let the paint dry completely before use.
Storage-friendly Console With Shelves
This console table adds shelves for extra storage. It fits well in busy hallways. You will use wood planks, screws, wood glue, and brackets to build it.
| Material | Quantity | Use |
|---|---|---|
| Wood planks | 4 | Top surface and shelves |
| Brackets | 6 | Support shelves and tabletop |
| Screws | 20 | Fasten parts together |
| Wood glue | 1 bottle | Secure joints |
Steps to build:
- Cut the wood planks for the tabletop and shelves.
- Attach brackets to the wall at the desired heights.
- Fix the shelves on the brackets with screws and glue.
- Place the tabletop on the top brackets and secure it.
- Sand all surfaces and apply paint or sealant.
Narrow Console For Small Spaces
This narrow console fits tight spaces while adding style. It has a slim profile but still holds essentials. You will need a narrow wood board, legs, screws, and finish materials.
- Pick a wood board no wider than 12 inches.
- Choose sturdy legs that fit the height you want.
- Attach legs to the board with screws.
- Sand and finish with paint or varnish.
- Let dry before placing items on it.
Creative Finishing Touches
A hallway console table can transform a simple space into a stylish area. Adding creative finishing touches makes your project unique and inviting.
Small details like hardware, paint, and lighting bring personality and charm to your DIY console table.
Decorative Hardware Choices
Hardware adds style and function to your console table. Choose knobs and handles that match your room’s look.
- Brushed brass for a warm, vintage feel
- Matte black for modern and sleek style
- Glass knobs for a classic, elegant touch
- Leather pulls for a rustic or boho vibe
Painting Techniques And Patterns
Paint can change the whole look of your console table. Use simple patterns or special techniques to add flair.
| Technique | Description |
| Ombre | Colors fade smoothly from dark to light |
| Stripes | Bold lines add a graphic look |
| Distressing | Creates an aged, vintage effect |
| Stenciling | Patterns add detail and interest |
Adding Lighting And Mirrors
Lighting and mirrors brighten the hallway and make the console table stand out. Choose simple options that fit your space.
Tips for Lighting and Mirrors
- Use small table lamps or LED strip lights under shelves
- Hang a round mirror above the table to add depth
- Choose mirrors with interesting frames for extra style
- Place candles or lanterns for soft, warm light

Credit: handmade-haven.com
Maximizing Function And Style
Creating a DIY hallway console table can enhance both function and style. A well-designed console table improves the look of your hallway.
With some creativity, you can make a console table that fits your needs. Focus on smart design to maximize space and utility.
Incorporating Storage Solutions
Storage is key for keeping hallways tidy. A console table can offer hidden storage options.
Consider adding drawers or shelves to your table. This helps organize items like keys, mail, and small accessories.
- Use baskets for storing scarves or gloves
- Install hooks for hanging bags
- Add a small bin for quick cleanup
Balancing Decor With Practicality
A console table should look nice but also be useful. Choose decor items that add beauty without cluttering the space.
Mix decorative pieces with functional items. This creates a balanced look that serves a purpose.
- Place a stylish lamp for lighting
- Use a decorative bowl for loose change
- Add a mirror to open up the space
Styling Tips For Hallway Spaces
Styling a hallway is about making it welcoming. A well-decorated console table sets the tone.
Choose colors and materials that match your home. Personal touches make the space feel inviting.
- Use family photos for a personal touch
- Place a vase with fresh flowers
- Select a rug that complements the table
Frequently Asked Questions
What Materials Are Best For Diy Hallway Console Tables?
Wood is the most popular material for hallway console tables. It’s durable, easy to work with, and offers a classic look. You can also use metal or reclaimed wood for a modern or rustic style. Choose materials based on your skill level and desired design.
How Do I Choose The Right Size For A Console Table?
Measure your hallway width and leave at least 30 inches of walking space. A console table should be narrow, typically 12-18 inches deep. The height should match the nearby furniture or be around 30-36 inches for easy use and aesthetics.
What Tools Do I Need For Building A Console Table?
Basic tools include a saw, drill, measuring tape, screws, and a screwdriver. Sandpaper and paint or stain are also useful for finishing. For more complex designs, a miter saw and clamps might be necessary. Start with simple tools if you’re a beginner.
How Can I Decorate A Diy Hallway Console Table?
Use decorative items like vases, lamps, or framed photos to personalize the table. Adding a small mirror or artwork above enhances the space. Keep decorations minimal to avoid clutter and maintain functionality in your hallway.
Conclusion
DIY hallway console tables add charm and function to your space. They are simple to build and fit any style or budget. These projects bring creativity and personality into your home. You can choose materials and designs that suit your needs perfectly.
Enjoy the satisfaction of making something with your own hands. Start small, then try more complex ideas as you gain confidence. Your hallway will feel fresh and inviting with a custom table. Give your entryway a unique touch today.