Are you looking to brighten up your hallway with a touch of charm and style? Choosing the right lantern placement can transform a dull corridor into a warm, inviting space.
You’ll discover simple and creative DIY projects that help you place lanterns perfectly, making your hallway both functional and beautiful. Whether you want a cozy glow or a bold statement, these ideas will inspire you to light up your home like never before.
Keep reading to find easy tips that anyone can try and see instant results!
Choosing The Right Lantern Style
Picking the right lantern for your hallway can change the entire space. The style you choose should match your home’s look and your personal taste.
Consider the lantern design, materials, and size to create a balanced and inviting hallway.
Vintage Vs Modern Designs
Vintage lanterns often have detailed metalwork and classic shapes. They add charm and a timeless feel. Modern lanterns use clean lines and simple forms. They fit well in minimal and contemporary homes.
- Vintage styles include lanterns with ornate patterns and warm, soft light.
- Modern styles focus on sleek designs with cool or neutral light tones.
- Choose vintage for a cozy, traditional hallway.
- Choose modern for a fresh, open look.
Materials And Finishes
| Material | Finish | Effect |
| Brass | Polished | Elegant and warm |
| Iron | Matte black | Rustic and bold |
| Glass | Clear or frosted | Bright and airy |
| Chrome | Shiny | Modern and sleek |
Choose materials that match other hallway fixtures. Finishes affect the lantern’s mood and how it fits with your decor.
Size And Scale Considerations
Lantern size must suit your hallway space. Too big can overwhelm, too small can look lost. Think about ceiling height and hallway width.
- Measure your hallway length and width.
- Choose a lantern size that leaves enough walking space.
- Match lantern height with ceiling height for balance.
- Use multiple small lanterns in long hallways.
- Use one larger lantern for short or narrow hallways.
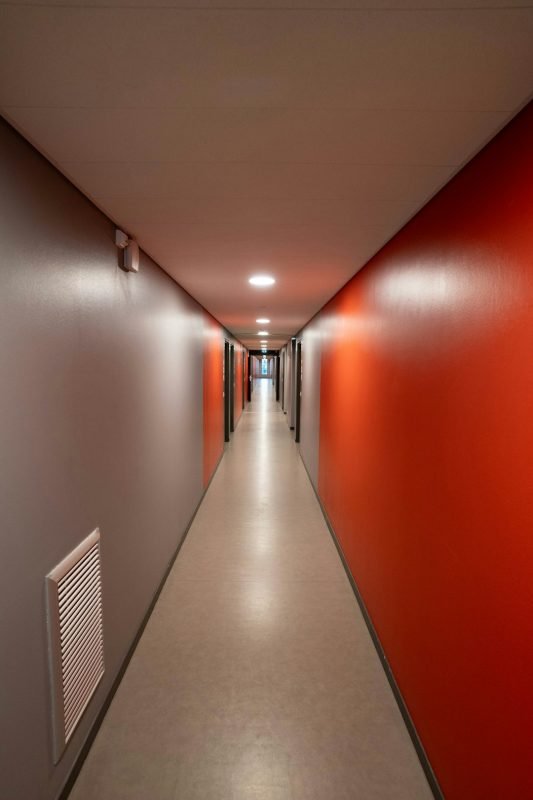
Ideal Lantern Placement Spots
Lanterns bring warmth and style to hallways. Choosing the right spots can improve light and look.
This guide shows good places to put hallway lanterns. It covers wall, ceiling, and corner spots.
Wall-mounted Positions
Wall-mounted lanterns add charm and focus light along the hallway. They save space and create a cozy feel.
Place lanterns near eye level for best visibility. They work well beside doors, mirrors, or artwork.
- Next to door frames for welcoming light
- Along the wall at regular intervals
- Near mirrors to reflect light
- Beside artwork or photos
Ceiling And Pendant Options
Ceiling lanterns shine down and light the whole hallway. Pendant lanterns hang lower and add style.
Center ceiling lanterns for even light. Pendants work well over stairs or narrow spots.
- Centered on the hallway ceiling
- Grouped pendants over staircases
- Near entryways for warm light
- Suspended at varying heights for interest
Corner And Niche Installations
Corners and niches are great for hidden lantern spots. They add light without crowding space.
Use small lanterns in these spots to highlight shapes and create depth.
- Inside recessed wall niches
- At hallway corners to soften edges
- Built-in shelves with lantern accents
- Under stair landings for subtle glow
Lighting Effects And Ambiance
Hallway lanterns add style and light to your space. Choosing the right placement changes how your hallway feels.
Light can create mood, guide guests, and highlight features. Use these tips to improve your hallway lighting.
Warm Vs Cool Light Choices
Warm light gives a cozy, inviting feeling. It works well in homes and softens the hallway.
Cool light feels clean and modern. It helps hallways look brighter and more spacious.
- Warm light color temperature: 2700K to 3000K
- Cool light color temperature: 4000K to 5000K
- Use warm light for relaxing spaces
- Use cool light for clear visibility
Layering With Other Light Sources
Combine lanterns with ceiling lights or wall sconces. This creates a balanced light effect.
Layered lighting helps avoid dark spots. It also adds depth and interest to the hallway.
- Use overhead lights for general brightness
- Add lanterns for decorative and accent lighting
- Include floor or table lamps near entryways
- Mix different light levels for comfort
Creating Shadows And Highlights
Lanterns can cast soft shadows that add texture to walls. This makes the hallway feel warmer and more dynamic.
Use lantern placement to highlight artwork or architectural details. Light and shadow together create visual interest.
- Place lanterns near textured walls for shadow effects
- Use adjustable lanterns to focus light on key spots
- Position lights to avoid harsh glare
- Mix direct and indirect lighting for balance
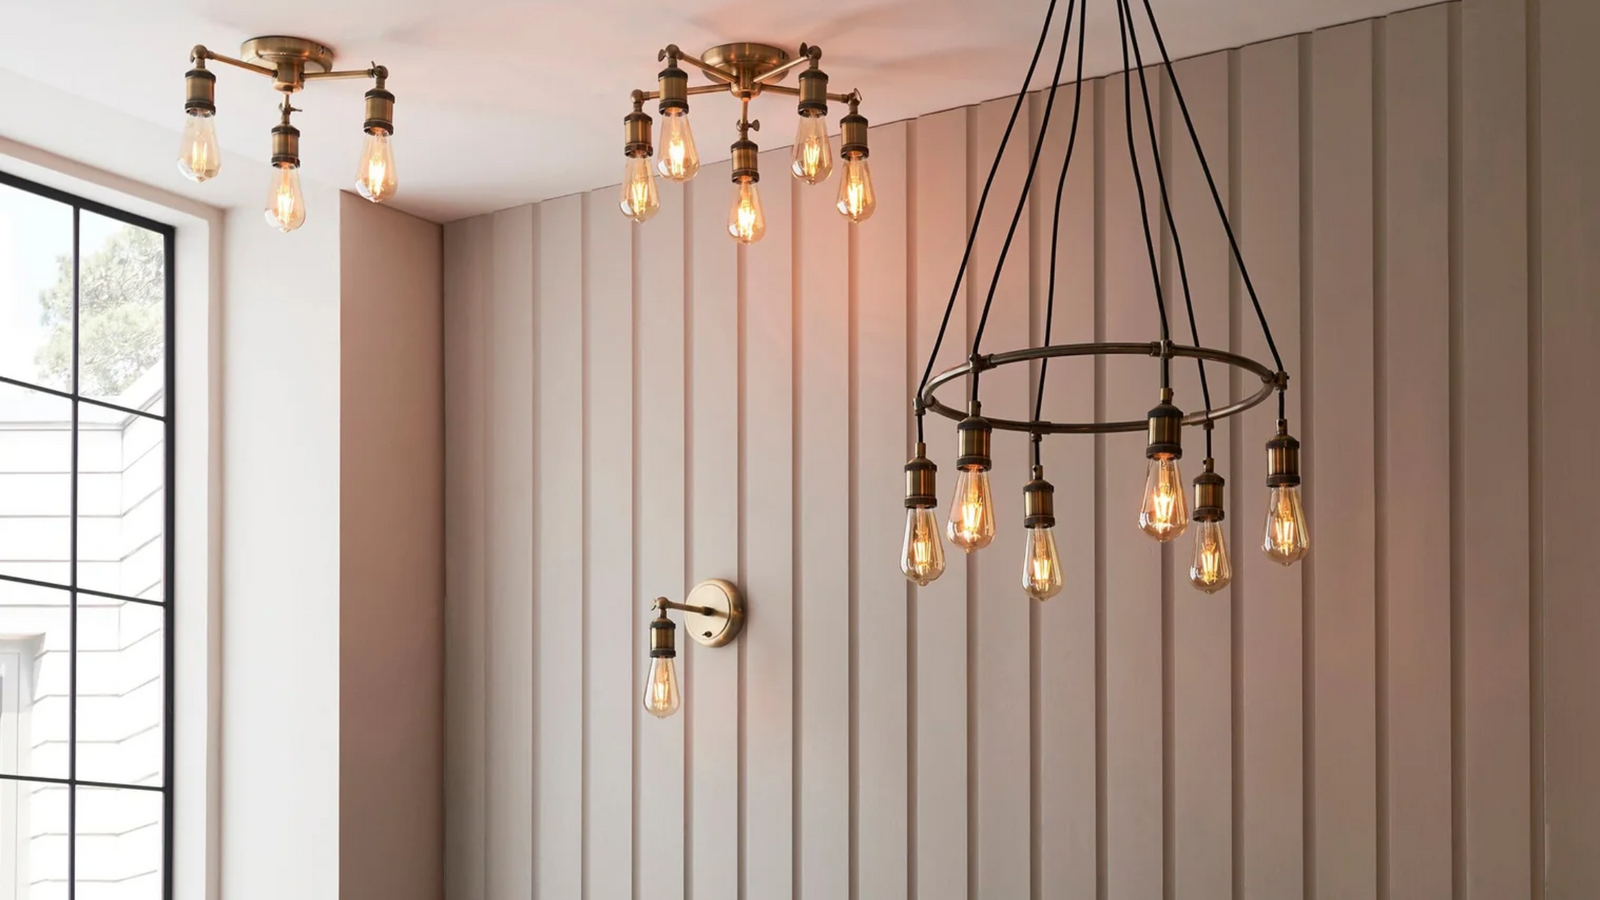
Credit: cometlighting.co.uk
Tools And Materials Needed
Installing a hallway lantern can brighten your space and add style. You need the right tools and materials for a safe job.
This guide covers the basic supplies you should gather before starting your project.
Basic Electrical Supplies
You will need electrical supplies to connect the lantern to power safely. These parts help the light work properly.
- Wire cutters and strippers
- Electrical tape
- Wire nuts for connecting wires
- Voltage tester to check power
- Electrical wires (usually 14 or 12 gauge)
- Light switch (if replacing or adding one)
- Lantern light fixture with bulbs
Mounting Hardware
Mounting hardware secures your lantern to the wall or ceiling. Use the correct items to hold the fixture safely.
- Screws suited for your wall type
- Anchors for drywall or plaster walls
- Mounting bracket included with the lantern
- Drill and drill bits
- Screwdriver (Phillips or flathead)
Safety Gear
Safety gear protects you during the installation. Always wear gear to avoid injuries and electrical shocks.
- Insulated gloves
- Safety glasses
- Dust mask if drilling
- Step ladder for high placement
- Proper footwear
Step-by-step Installation Guide
Installing a hallway lantern can improve your home’s lighting and style. This guide helps you place it right.
Follow each step carefully to ensure safety and a neat finish. You can do it yourself with basic tools.
Preparing The Space
Clear the hallway area where you want to install the lantern. Remove any old fixtures if needed.
Turn off the power at the circuit breaker. Use a voltage tester to confirm no electricity flows to the wires.
- Clear the wall space
- Remove old light fixtures
- Switch off power
- Test wires for safety
Wiring And Mounting
Connect the lantern’s wires to the house wiring. Match colors: black to black, white to white, green to ground.
Secure the lantern base to the wall with screws. Make sure it is level and firmly attached.
- Match wire colors properly
- Use wire nuts for secure connections
- Attach mounting bracket to wall
- Fix lantern base on the bracket
Testing And Adjustments
Turn the power back on and test the lantern. Check if it lights up correctly and stays stable.
If needed, adjust the lantern’s position or tighten screws. Make sure it is safe and looks good.
- Switch power on
- Test light function
- Adjust position if needed
- Tighten all screws
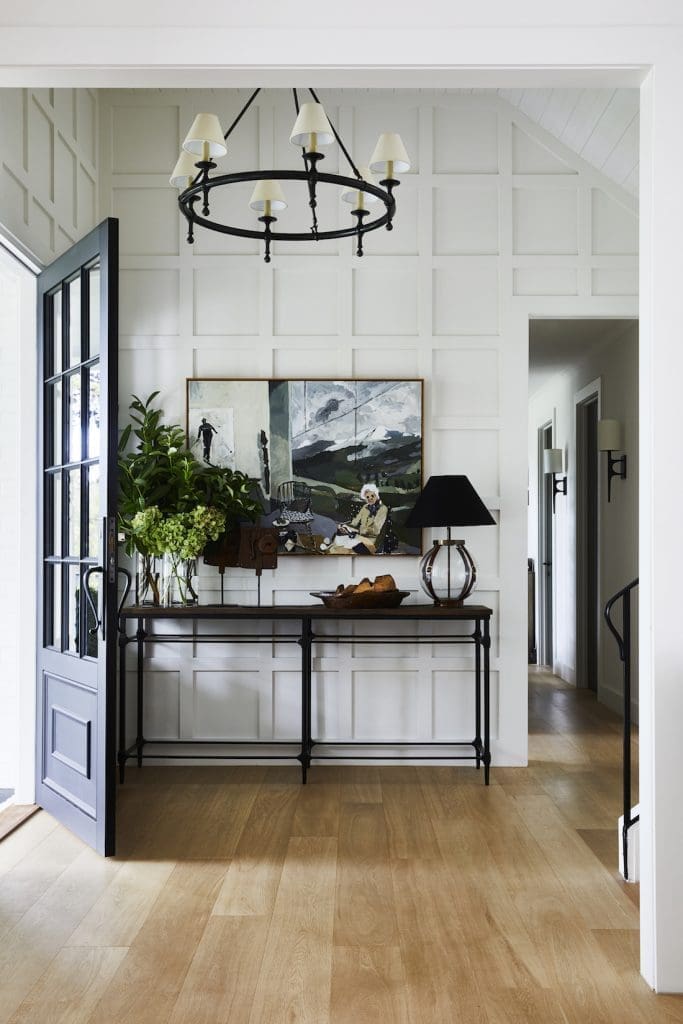
Credit: stylecurator.com.au
Creative Diy Lantern Projects
Lanterns can brighten up your hallway and add warmth to your home. DIY lantern projects are fun and easy to create.
Let’s explore some creative ways to make your own lanterns using everyday materials.
Repurposed Jars And Bottles
Old jars and bottles can be transformed into beautiful lanterns. They are easy to customize and decorate.
- Collect glass jars or bottles of different sizes
- Clean them thoroughly
- Add tea lights or LED candles inside
- Decorate with paint, ribbons, or twine
Rustic Wood Lanterns
Wooden lanterns give a natural and cozy touch to any space. You can use reclaimed wood to make them.
| Material | Purpose |
| Reclaimed wood | Lantern frame |
| Nails and glue | Assembly |
| Sandpaper | Smooth finish |
| Wood stain | Color and protection |
Painted And Decorated Fixtures
Bring vibrant colors to your hallway with painted lanterns. You can express your creativity through different designs.
Maintenance And Troubleshooting
Maintaining your DIY hallway lanterns ensures they last longer. Troubleshooting common issues keeps them shining bright.
Regular care and simple fixes can make your lanterns look and work like new. Follow these tips to keep your hallway well-lit and welcoming.
Cleaning Tips
Dust and dirt can dull your lantern’s shine. Cleaning helps maintain their brightness and charm.
Use a soft cloth to gently wipe away dust. Avoid harsh chemicals that can damage the surface.
- Remove the glass panels carefully
- Clean with a mild soap solution
- Dry thoroughly before reassembling
Replacing Bulbs Safely
Replacing bulbs is necessary when they burn out. Doing it safely prevents accidents.
Turn off the power before starting. Let the bulb cool down to avoid burns.
- Use a ladder if the lantern is high
- Wear gloves to protect your hands
- Ensure the new bulb is the correct wattage
Fixing Common Issues
Loose connections and flickering lights are common problems. Fixing them is easy with the right steps.
Check if the wires are securely connected. Tighten any loose screws to ensure stability.
- Inspect for burnt-out bulbs
- Examine the wiring for any damage
- Replace damaged parts promptly

Credit: www.projectallendesigns.com
Frequently Asked Questions
What Is The Best Height For Hallway Lantern Placement?
The ideal height for hallway lanterns is 6 to 7 feet from the floor. This ensures optimal lighting and aesthetics. Proper height prevents glare and creates a welcoming atmosphere in the hallway.
How Do I Choose The Right Size Lantern For My Hallway?
Select a lantern size proportional to your hallway width. For narrow hallways, smaller lanterns work best. Larger hallways can accommodate bigger or multiple lanterns. Balance size to avoid overcrowding or under-lighting the space.
Can I Install Diy Lanterns Without Professional Help?
Yes, many hallway lanterns come with easy DIY installation guides. Basic electrical knowledge is helpful, but most projects require simple tools. Always ensure power is off before installation for safety.
What Style Of Lantern Suits Modern Hallway Designs?
Sleek, minimalist lanterns with clean lines suit modern hallways. Metal finishes like matte black or brushed nickel complement contemporary décor. Choose lanterns with clear or frosted glass for a stylish look.
Conclusion
DIY hallway lantern projects add charm and light to any space. Choosing the right spot makes a big difference. Simple steps can brighten your hallway quickly. These projects save money and bring a personal touch. Try different styles to match your home’s look.
Small changes create a warm and welcoming feel. Start your project today and enjoy the glow. Your hallway deserves a fresh, cozy update.