Your hallway is more than just a passage; it’s the first glimpse guests get of your home’s personality. Imagine transforming that plain space into a gallery of memories and style—without spending a fortune.
With these DIY hallway picture frame projects, you can easily add charm, warmth, and creativity to your walls. Whether you want a sleek modern look or a cozy vintage feel, these ideas are simple and fun to try. Ready to turn your hallway into a stunning showcase?
Let’s dive in and make your walls speak your story.
Credit: garrisonstreetdesignstudio.com
Choosing Frames For Your Hallway
Choosing the right picture frames can change your hallway’s look. Frames show your style and protect your photos or art.
Think about the space and the mood you want. Frames should fit well with your hallway design.
Materials And Styles
Frames come in many materials like wood, metal, and plastic. Each gives a different feel to the hallway.
Wood frames add warmth and work with classic or rustic styles. Metal frames look modern and sleek. Plastic frames are light and budget-friendly.
- Wood: warm, natural, traditional
- Metal: cool, modern, industrial
- Plastic: light, colorful, affordable
Sizes And Shapes
Pick frame sizes that fit your photos and the hallway space. Small frames work well in tight spaces.
Mix shapes like squares, rectangles, and circles for visual interest. Keep some consistency to avoid clutter.
- Small frames for narrow walls
- Large frames for open walls
- Mix shapes for style
- Keep alignment neat
Color Coordination
Match frame colors to your hallway walls and decor. This creates a balanced and pleasant look.
Neutral colors like black, white, or brown work with most styles. Bright colors add fun and focus.
- Neutral frames for a clean look
- Bright frames for a pop of color
- Match frame color with wall or furniture
- Use metallic frames for a stylish shine
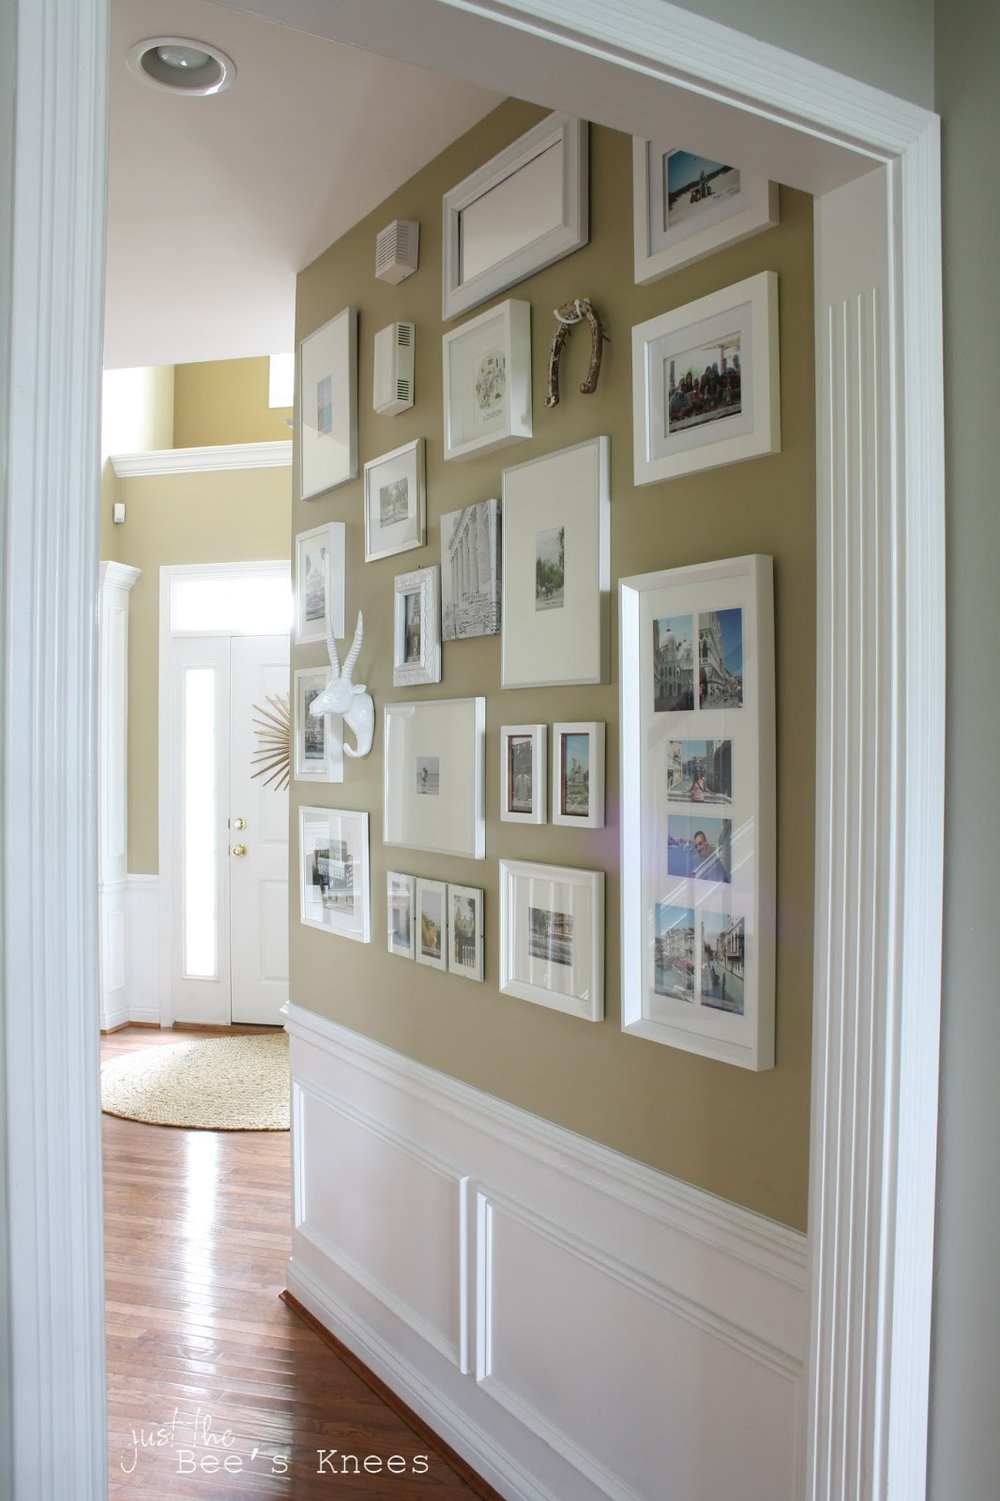
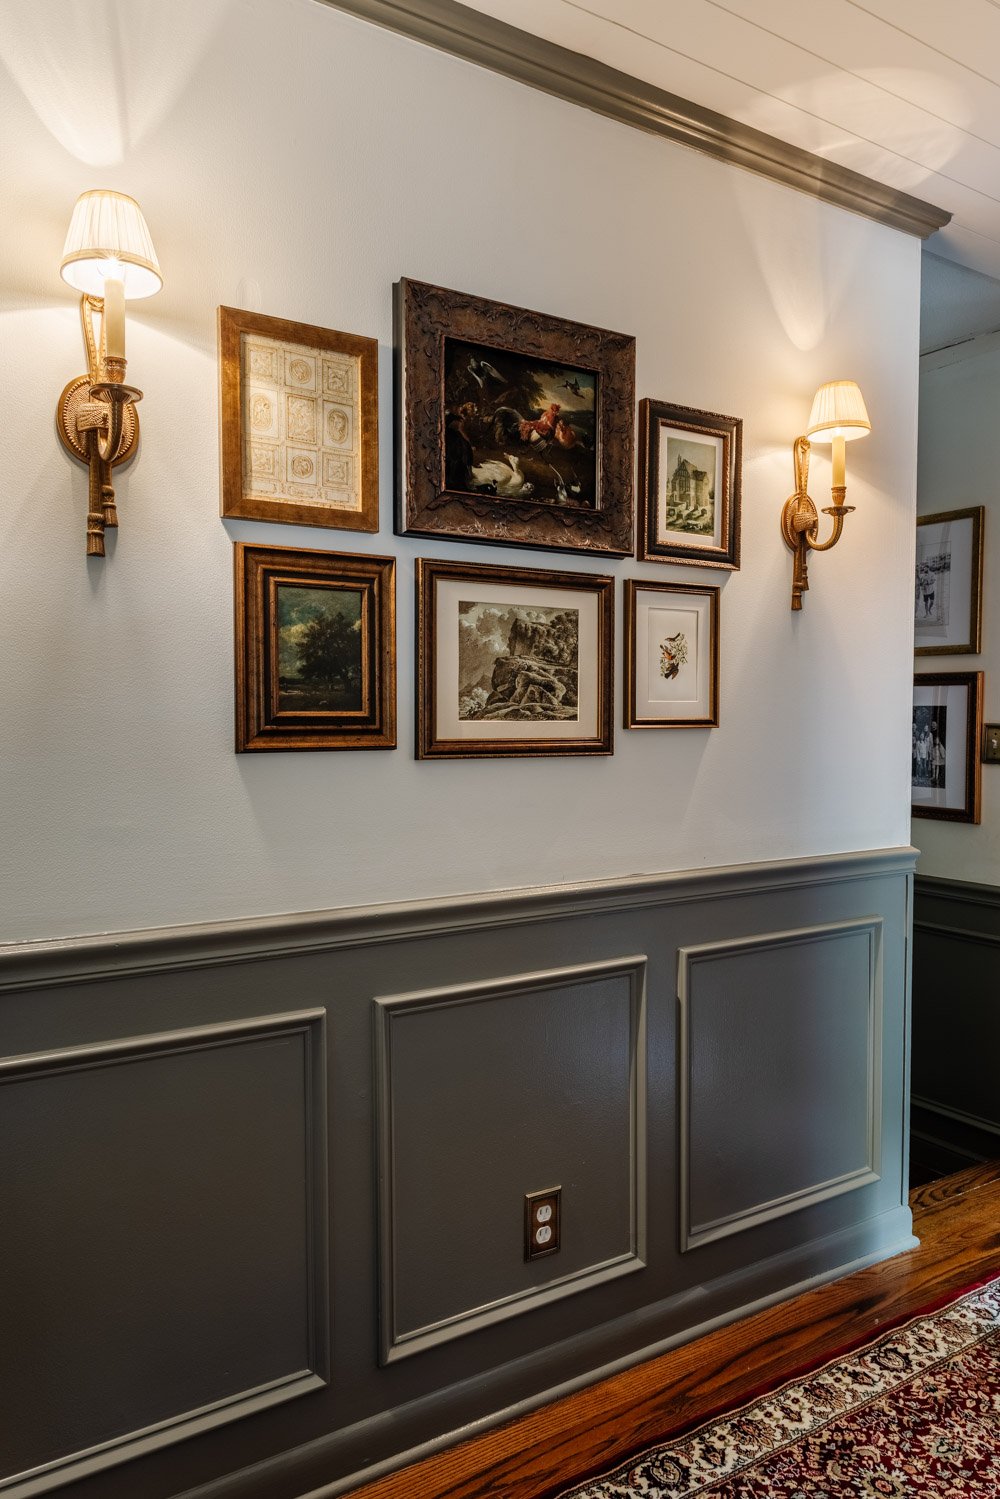
Creative Layout Ideas
DIY hallway picture frame projects add charm to your home. A creative layout makes your hallway interesting.
Choosing the right design can highlight your photos and art beautifully. Think about how to arrange frames for the best effect.
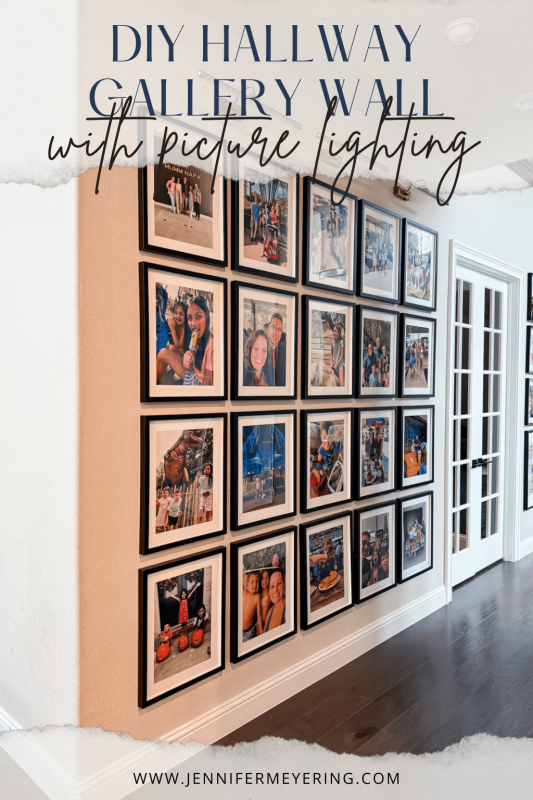
Gallery Wall Arrangements
A gallery wall means grouping many frames close together. It creates a strong visual impact in your hallway.
You can arrange frames by size, shape, or theme. Try laying them on the floor before hanging to find the best fit.
- Start with a large central piece
- Fill gaps with smaller frames
- Keep even spacing between frames
- Use a mix of horizontal and vertical frames
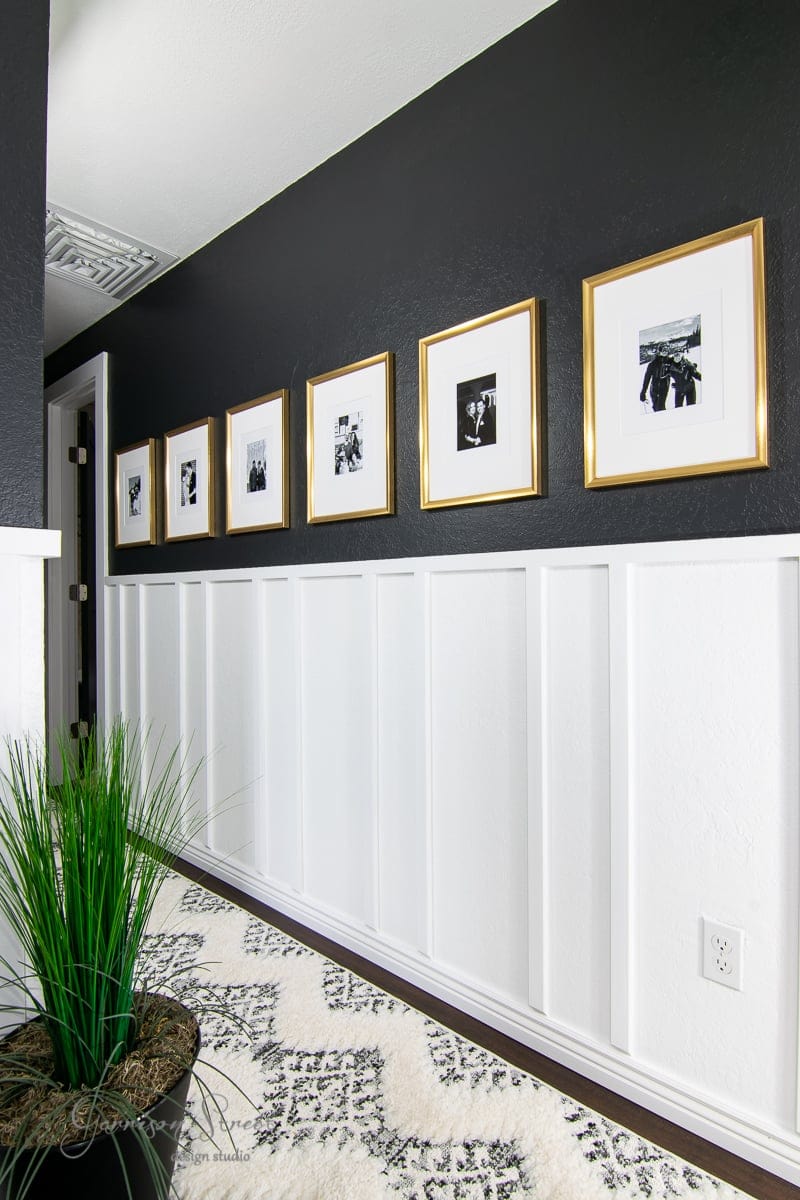
Symmetrical Vs Asymmetrical
Symmetrical layouts have frames balanced on each side. This style looks neat and organized.
Asymmetrical layouts place frames unevenly. This style feels more casual and creative.
- Symmetrical: same frames on both sides
- Asymmetrical: different sizes and shapes
- Symmetrical suits formal spaces
- Asymmetrical fits modern, fun areas
Mixing Art And Photos
Combining art and photos makes your hallway unique. It shows your style and memories together.
Use different frame styles to separate art from photos. This mix adds texture and interest to your wall.
- Place art pieces with bold colors
- Surround them with black-and-white photos
- Use matching frames for harmony
- Leave space between art and photos for balance
Diy Frame Making Techniques
Creating your own picture frames can add a personal touch to your hallway decor. Learning basic techniques helps you build unique frames that fit your style.
This guide covers different ways to make frames using wood, paint, and decorative details. Each method is easy and fun for DIY lovers.
Using Wood And Reclaimed Materials
Wood is a popular choice for making picture frames. Reclaimed wood adds character and is eco-friendly. You can find old pallets, barn wood, or scraps to reuse.
- Choose wood pieces with interesting grain or texture
- Cut the wood to the size of your picture
- Sand edges smooth for safety and finish
- Join corners using nails, glue, or brackets
- Seal the wood with clear varnish or stain
Decorative Painting And Finishing
Painting your frame can add color and style. Use different painting techniques to create patterns or vintage looks. Finishing touches protect the paint and wood.
| Technique | Effect | Materials Needed |
| Dry Brushing | Soft, textured look | Paint, dry brush |
| Distressing | Worn, antique feel | Sandpaper, paint |
| Layering | Multiple colors visible | Paint, brushes |
| Sealing | Protects paint | Clear varnish or wax |
Adding Texture And Embellishments
Textures and decorations make your frame stand out. You can add items like beads, fabric, or metal pieces. These details create interest and match your hallway style.
- Glue small beads or buttons along the edges
- Wrap twine or ribbon around the frame corners
- Attach metal corners or decorative nails
- Use textured paint or plaster for raised designs
Personalizing Your Frames
Personalizing picture frames makes your hallway more inviting. It shows your style and memories in a unique way.
You can use different ideas to make your frames special. Adding words, photos, or themes changes the whole look.
Incorporating Quotes And Typography
Adding quotes or typography adds meaning to your frames. Choose words that inspire or make you smile. Use different fonts and colors for fun effects.
- Pick short and meaningful quotes
- Use bold or script fonts for style
- Mix colors that match your hallway
- Try hand-painted letters for a personal touch
Photo Collages And Memorabilia
Mix photos with small keepsakes like tickets or notes. This tells a story and makes your wall more interesting.
| Item | Example |
| Photo | Family vacation |
| Ticket | Concert or movie |
| Note | Handwritten message |
| Small object | Pressed flower |
Seasonal And Themed Displays
Change your frames for seasons or events. Use colors and images that fit the theme. This keeps your hallway fresh all year.
Ideas for Seasonal Frames
- Spring: Flowers and pastel colors
- Summer: Beach scenes and bright tones
- Fall: Leaves and warm shades
- Winter: Snowflakes and cool blues
Installing Frames Safely
Hanging picture frames in your hallway can brighten the space. Doing it safely keeps walls and frames damage-free. Use the right tools and methods for a perfect display.
Follow simple tips to protect your walls and keep frames aligned. Careful spacing makes your hallway look neat and inviting.
Tools And Hardware Needed
Gather these tools and hardware before starting your project. Using the right supplies helps secure frames safely on the wall.
- Measuring tape for accurate placement
- Level to keep frames straight
- Hammer or drill depending on wall type
- Nails, screws, or picture hooks
- Wall anchors for heavy frames
- Pencil for marking spots
- Stud finder to locate studs behind drywall
Wall Protection Tips
Protect your walls from holes and scratches. Use these easy tips to keep walls clean and safe while hanging frames.
| Tip | How to Do It |
|---|---|
| Use Painter’s Tape | Place tape where you plan to hammer to avoid paint chips. |
| Choose Proper Hooks | Use hooks that match frame weight to prevent wall damage. |
| Check Wall Type | Identify drywall, plaster, or brick to pick the right fasteners. |
| Use Wall Anchors | Insert anchors in drywall for heavy or large frames. |
| Mark Lightly | Use a pencil to mark holes gently without leaving marks. |
Aligning And Spacing
Proper alignment and spacing make your hallway frames look balanced. Measure and plan before hanging each piece.
- Measure the total wall space where frames will hang.
- Decide the number of frames and their sizes.
- Calculate even spacing between frames and wall edges.
- Use a level to mark straight lines for hanging points.
- Hang frames starting from the center outward for balance.
Credit: www.interiorsbysarahlangtry.com
Maintaining And Refreshing Displays
Hallway picture frames add character to your home. Keeping them fresh and clean is essential. This ensures your display stays attractive and inviting.
Regular updates to your frames can breathe new life into your hallway. Small changes make a big impact on the overall look.
Cleaning And Care
Dust and dirt can accumulate on frames. Cleaning them is simple but necessary. Use a soft cloth to wipe the surfaces gently.
For glass areas, use a mild cleaner. This prevents streaks and keeps pictures clear. Regular care will help your frames last longer.
- Use a soft, lint-free cloth
- Apply a gentle glass cleaner
- Check for any loose nails or hooks
Swapping Art And Photos
Changing the photos or art can give new energy to a space. Select pictures that reflect the season or your current mood.
Consider a mix of family photos and artwork. This creates a balanced and personal display.
- Choose a theme for consistency
- Mix sizes for a dynamic look
- Keep recent memories in rotation
Updating Styles Over Time
Styles change over time. Updating frames and layouts keeps your hallway modern. Consider changing frame colors or materials.
Try different arrangements on the wall. This can make your collection feel new and exciting again.
- Paint frames for a fresh look
- Experiment with new layouts
- Introduce trendy frame styles
Credit: www.blesserhouse.com
Frequently Asked Questions
What Materials Are Best For Diy Hallway Picture Frames?
Wood, metal, and recycled materials work well for DIY hallway frames. Choose lightweight options for easy hanging and durability. Acrylic or glass can protect your photos and art. Select materials that match your hallway’s style and color palette for a cohesive look.
How Can I Arrange Picture Frames In A Hallway?
Arrange frames in a grid, gallery wall, or linear pattern. Mix frame sizes and orientations for visual interest. Use consistent spacing between frames to keep the display neat. Plan the layout on the floor before hanging to ensure balance and flow.
What Tools Do I Need For Hallway Frame Projects?
Basic tools include a hammer, nails, measuring tape, level, and pencil. Picture hanging hooks or adhesive strips help avoid wall damage. A screwdriver may be needed for frame assembly. Having these tools ready makes the project smoother and faster.
How Do I Protect Photos In Hallway Frames?
Use UV-protective glass or acrylic to prevent fading from sunlight. Avoid placing frames in direct sunlight or damp areas. Laminating photos before framing can add extra protection. Regularly dust frames to keep them clean and clear.
Conclusion
DIY hallway picture frame projects add charm and personality to your space. They bring life to empty walls and show your style. Simple materials and a bit of time create unique frames. You can change photos or art whenever you want.
These projects make your hallway feel warm and inviting. Try different shapes and colors to match your home. Enjoy the process and have fun crafting. Small changes can make a big difference in your hallway’s look. Start your next project today and brighten your home easily.