Are you looking to create the perfect bed frame for your little one’s nursery without spending a fortune? Building your own DIY nursery bed frame can be a fun and rewarding project that lets you add a personal touch to your child’s space.
Imagine having a sturdy, safe, and stylish bed frame that fits perfectly in your nursery—designed by you, for your child. You’ll discover simple steps, helpful tips, and creative ideas to make your DIY nursery bed frame both beautiful and practical.
Keep reading to turn your vision into reality and give your baby a cozy place to rest and grow.

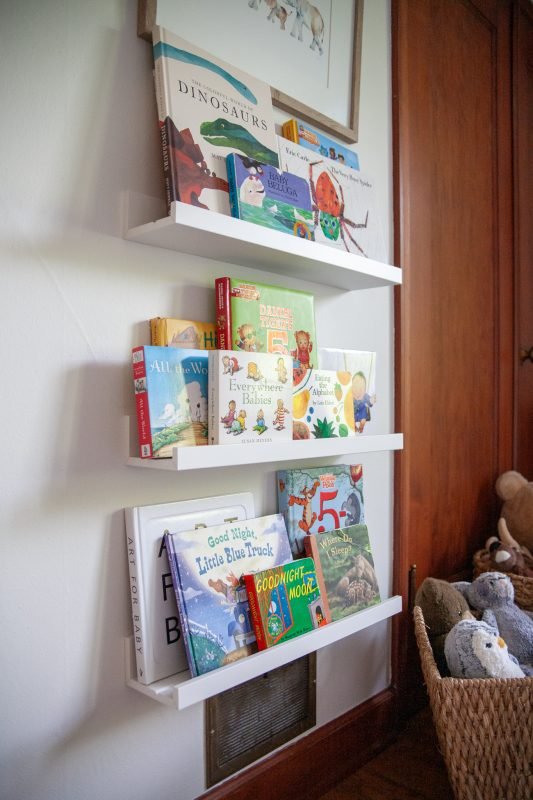
Credit: www.create-enjoy.com
Choosing The Right Materials
Choosing the right materials is important for building a nursery bed frame. The material affects safety, durability, and comfort. Knowing your options helps you make a good choice.
This guide covers wood types, eco-friendly choices, and safety tips for your DIY nursery bed frame.
Wood Types And Benefits
Wood is a popular choice for nursery beds. It is strong and looks nice. Some woods are better for beds than others.
- Pine:Affordable and easy to work with. It is lightweight but less durable.
- Oak:Very strong and long-lasting. It has a nice grain and resists dents.
- Maple:Hard and smooth. It holds finishes well and resists scratches.
- Birch:Sturdy and light-colored. It is good for painting or staining.
Eco-friendly Options
Eco-friendly materials reduce harm to the environment. They are safe for children and last a long time.
| Material | Description | Benefit |
| Bamboo | Fast-growing grass that works like wood | Renewable and strong |
| Reclaimed Wood | Wood reused from old furniture or buildings | Less waste and unique look |
| Non-toxic Finishes | Paints and stains without harmful chemicals | Safe for babies and the environment |
Safety Considerations
Safety is the top priority for nursery beds. Materials should not have sharp edges or toxic chemicals. Sturdy construction keeps the bed stable.
- Use smooth wood to avoid splinters.
- Choose non-toxic glue and finishes.
- Check that nails and screws are secure and flush.
- Make sure corners are rounded or covered.
- Test the bed frame for wobbling before use.

Credit: www.youtube.com
Simple Designs For Beginners
Building a nursery bed frame can be easy for beginners. You need simple designs that use basic tools and materials. These ideas will help you create safe and cozy beds.
We will explore three types of DIY nursery bed frames. Each design focuses on simplicity and creativity for first-time builders.
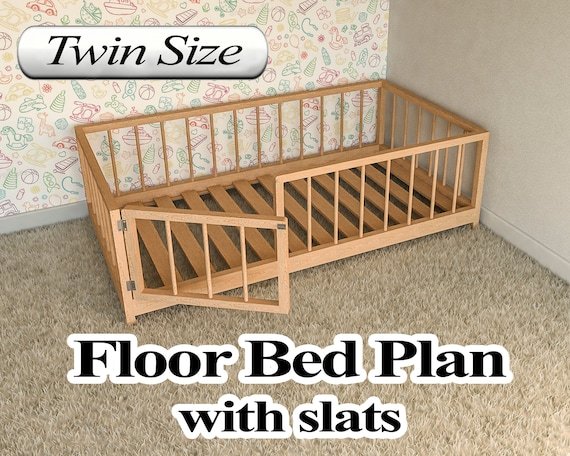
Basic Platform Beds
Platform beds are flat and low. They need only a few pieces of wood and screws. This style works well for toddlers who need a safe sleeping space.
- Use plywood or solid wood boards for the base
- Attach legs or keep it directly on the floor
- Add a guardrail for extra safety
- Paint or stain the wood to match the nursery
Box Frame Ideas
Box frames look like open boxes to hold the mattress. They are easy to build with wood planks and nails. You can add storage space under the bed.
| Material | Use | Notes |
| Wood planks | Frame sides and base | Choose smooth, splinter-free wood |
| Screws | Join planks together | Use rust-resistant screws |
| Paint | Protect and decorate | Non-toxic paint is best for children |
Using Pallets Creatively
Old pallets can be turned into unique bed frames. Sand them well to remove rough edges. Pallets give a rustic look to the nursery.
Try these tips when using pallets:
- Choose sturdy pallets with no chemical stains
- Cut pallets to the mattress size
- Stack pallets for extra height if needed
- Secure pallets with screws or brackets
- Finish with child-safe varnish or paint
Themed Bed Frames
Themed bed frames make a nursery more fun and special. They create a cozy space for kids to sleep and play.
Building your own themed bed frame lets you add personal touches. You can match the room’s style or your child’s favorite ideas.
Castle And Fort Styles
Castle and fort style beds bring stories to life in the nursery. These frames look like mini castles or forts for adventurous kids.
Use wood or painted details to add turrets, windows, and doors. These designs make bedtime feel like a royal or brave quest.
Animal-inspired Designs
Animal-inspired bed frames add charm and playfulness to the room. They can look like favorite animals or imaginary creatures.
Shapes like bears, rabbits, or owls can be carved or painted on the frame. These designs help kids feel close to nature and animals.
Nature And Forest Themes
Nature and forest themed beds create a calm and peaceful nursery. They often use wood and green colors to look like trees and plants.
Adding leaves, branches, or animal shapes makes the bed feel like a small forest home. This style connects children with the outdoors.

Credit: www.youtube.com
Storage Solutions Built-in
DIY nursery bed frames with built-in storage help keep the room tidy. They make it easy to store baby items within reach.
Good storage solutions save space and add functionality to the nursery. They keep essentials organized and accessible.
Under-bed Drawers
Under-bed drawers provide large storage space without cluttering the room. You can store toys, clothes, and bedding inside them.
- Easy to slide open and close
- Keep items hidden but accessible
- Use soft-close runners for safety
- Customize drawer sizes to fit needs
Shelves And Compartments
Shelves and compartments built into the bed frame offer quick access to small items. These include books, diapers, and toys.
| Type | Use | Placement |
| Open Shelf | Display books and toys | Side of bed frame |
| Closed Compartment | Hide diapers and wipes | Headboard area |
| Small Cubby | Store baby essentials | Near footboard |
Multi-functional Features
Multi-functional bed frames combine storage with other uses. Some beds include changing tables or seating areas.
Common multi-functional features:
- Built-in changing table on one side
- Fold-out seating or play area
- Hidden storage under mattress
- Convertible bed for growing child
Painting And Finishing Touches
Painting and finishing add beauty and safety to your DIY nursery bed frame. Use the right materials for a smooth, lasting finish.
Choosing safe paints and coatings protects your baby from harmful chemicals. Personalizing with patterns makes the bed unique.
Non-toxic Paint Options
Use paints that are free from lead and VOCs. Water-based paints dry fast and have less odor.
- Milk paint is natural and safe for children.
- Clay paint offers a soft, matte finish.
- Low-VOC acrylic paints are easy to clean.
- Look for certifications like GREENGUARD or ASTM D-4236.
Custom Patterns And Decals
Add personality with hand-painted patterns or vinyl decals. Simple shapes or nature themes suit a nursery well.
| Pattern Type | Description | Best Tool |
| Stripes | Horizontal or vertical lines | Painter’s tape |
| Polka Dots | Small round shapes | Stencil or sponge |
| Animal Decals | Stick-on vinyl shapes | Transfer paper |
| Floral Designs | Simple flower shapes | Brush or stencil |
Protective Coatings
Seal the paint with a clear finish to protect from scratches and spills. Choose coatings safe for babies.
- Water-based polyurethane is durable and non-toxic.
- Natural oils like tung or linseed dry slowly but are safe.
- Wax finishes add shine but need reapplication.
- Avoid coatings with strong fumes or chemicals.
Safety Tips For Diy Beds
Creating a nursery bed frame yourself can be fun. Safety is the most important thing to consider. Here are some tips to keep the bed safe for your little one.
Focus on smooth edges, stable construction, and proper mattress fit. These will help ensure your baby sleeps safely.
Smooth Edges And Corners
Sharp edges can harm your baby. Make sure all edges and corners are smooth. Use sandpaper to remove any rough parts.
Round off the corners to avoid any injuries. Soft edges help in preventing accidents in the nursery.
Stable Construction
A stable bed frame is crucial for safety. Check all joints and screws to ensure they are tight.
Use strong materials like solid wood for better stability. Test the bed’s sturdiness before using it for your baby.
Proper Mattress Fit
The mattress should fit snugly in the bed frame. Gaps between the mattress and frame can be dangerous.
Measure the mattress and frame carefully. Ensure there are no spaces where a baby could get stuck.
- Choose a standard-sized mattress
- Test the fit before use
- Replace the mattress if it is too small
Budget-friendly Hacks
Creating a nursery bed frame doesn’t have to break the bank. With some creativity and smart choices, you can build a cozy and safe space for your baby.
Explore ways to recycle old items and find affordable materials to craft a unique nursery bed frame.
Recycling Old Furniture
Transforming old furniture into a nursery bed frame is both eco-friendly and cost-effective. Look around your home for unused items that can be repurposed.
- Convert an old crib into a toddler bed.
- Use a bookshelf as a headboard.
- Repurpose a wooden table for bed slats.
Affordable Material Sources
Finding budget-friendly materials is easier than you think. Check out local stores and online platforms for great deals on supplies.
| Material | Source |
| Wooden pallets | Local hardware store |
| Paint | Discount online stores |
| Screws and nails | Community swap meets |
Creative Upcycling Ideas
Upcycling is a great way to add personality to your nursery. Use your creativity to turn everyday items into something special for your baby.
Involving Kids In The Project
Building a DIY nursery bed frame with your children is a fun way to spend time together. It helps kids learn new skills and feel proud of their work.
Involving kids makes the project special. They get to see how things come together and enjoy the final result even more.
Age-appropriate Tasks
Give children tasks that match their age and skills. This keeps them safe and confident during the project.
- For toddlers: sorting screws or holding small tools
- For preschoolers: painting or sanding wood pieces
- For older kids: measuring, hammering, or assembling parts
Encouraging Creativity
Let kids add their own ideas to the bed frame. This makes the project unique and fun for them.
Try these creative options:
- Choose paint colors together
- Add stickers or decals
- Design simple shapes or patterns on wood
Building Memories Together
Working on the bed frame creates lasting memories. Kids remember the fun and teamwork.
| Activity | Memory Created |
| Measuring wood | Learning patience and precision |
| Painting | Expressing personality and style |
| Assembling parts | Feeling proud of teamwork |
Frequently Asked Questions
What Materials Are Best For Diy Nursery Bed Frames?
Wood is the most popular material for DIY nursery bed frames. It is durable, safe, and easy to work with. Pine and oak are common choices due to their strength and affordability. Avoid toxic finishes to ensure a safe environment for your baby.
How Do I Ensure Nursery Bed Frame Safety?
Use non-toxic paints and finishes to protect your baby from harmful chemicals. Ensure all edges are smooth and corners rounded to prevent injuries. Secure all joints tightly and avoid small parts that can become choking hazards. Always follow safety standards for baby furniture.
What Tools Do I Need For Making A Nursery Bed Frame?
Basic woodworking tools like a saw, drill, screwdriver, and measuring tape are essential. Sandpaper, clamps, and wood glue help in assembly and finishing. Having a level and square ensures accuracy. Choose tools based on your bed frame design complexity.
How Long Does It Take To Build A Diy Nursery Bed Frame?
Most simple DIY nursery bed frames take about 4 to 8 hours to build. More intricate designs or first-time projects may take longer. Planning and preparation can reduce construction time significantly. Always allocate extra time for finishing and drying.
Conclusion
Building your own nursery bed frame brings joy and pride. It saves money and lets you customize every detail. Simple tools and basic skills create a safe, cozy space for your child. Taking time to plan ensures the frame fits perfectly.
Enjoy the process and watch your nursery come alive. This project adds a personal touch to your home. Start small, stay patient, and see great results. Your child will love the unique bed you made just for them.